
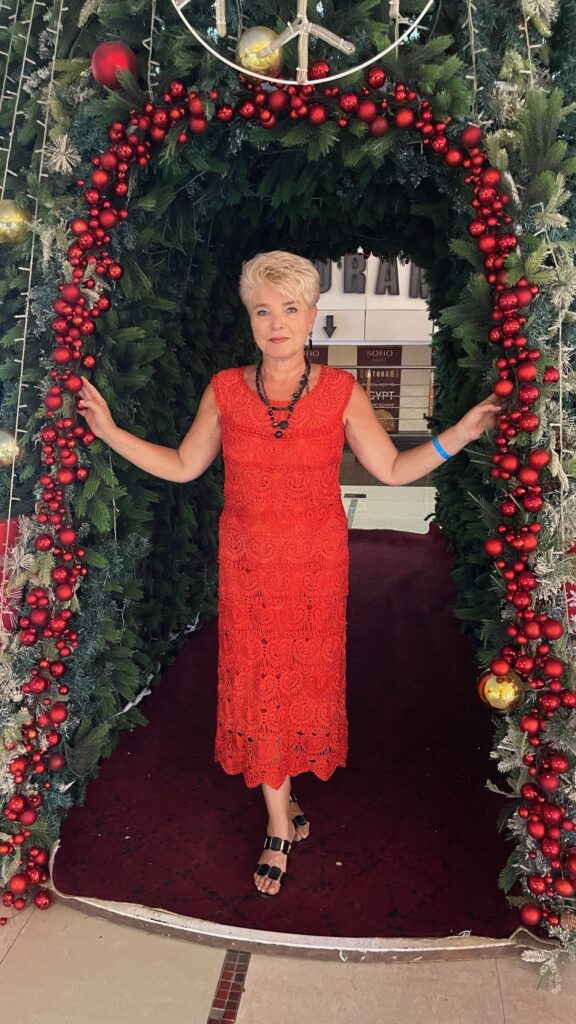
Crochet dresses by designer Vanessa Montoro are fantastically beautiful and incredibly practical. Equally appropriate for celebrations and everyday life.
Автор модели Лилия Вигнан. Опубликовано на сайте www.liliavignan.com
“Heart dress” is knitted from 550g of Turkish yarn TULIP 250m/50g red – 100% microfiber.
Clover hook 1.5mm

The following abbreviations are used to describe the work:
VP – air loop;
Runway – air lift loop;
СС – connecting column;
RLS – single crochet;
Dc – double crochet;
СС2Н - double crochet stitch;
СС3Н – column with three crochets;
Schemes taken from Oksana Kulbanskaya.
The main element is a heart, we knit according to the pattern. The width of the motif is 9.5 cm.

Scheme of the main motive


Description of the main motive
We cast on a chain of 15 chain stitches and close it in an SS ring, then we cast on another 32 air loops, and we also close the last 15 into a ring.
Row 1 - 3 runways (3 lifting loops - this is instead of 1 double crochet) and we knit 17 double crochets into a ring (18 in total according to the pattern). Then we start knitting along the chain - we knit 8 dc, and in the 9th loop of the chain we knit 2 dc. Next, we knit again 8 DCs along the chain and 18 stitches in the ring.
Attention! Dc knit behind (one) back wall of the VP.
2nd row - we start by lifting from 3 runways, unfold the work and continue knitting: * 2 chain loops, 1 double crochet * etc. - we make double crochets through one loop of the previous row. So we knit 16 DCs to the middle of the motif, and then 2 DCs in the middle of the motif and another 16 DCs to the end of the row.
3rd row – 3VPP, 49 Dc in each column of the previous row, in the middle of the motif 5 Dc and then 49 Dc, in the last column of the previous row we knit another 1 Dc.
4th row – turn the motif to the wrong side and make a sc in the central loop of the cast-on edge. Then join together 11dc on one side of the motif with 11dc on the other side using a sc stitch.
Unfold the motif and perform a binding along the front side: 5 sc, * picot from 4 ch, 2 dc * - 25 times, 5 dc, sl st to the beginning of the row.
If this is not the first motive, do not forget to connect the motives to each other using picot.
I burn the tails of threads of this quality with a lighter. You just need to burn it quickly and stick the thread with the back of the lighter. Your thread will not run away or unravel anywhere.

We knit the dress from top to bottom in circular stripes of hearts.
General view of the finished product and numbering of stripes to describe the work.

1 – stripe – yoke – 10 hearts.
The connection of motifs during knitting of the last row is shown in the diagram.

In the yoke and in the main fabric, the motifs are connected as follows:
Description of the picot connection in the yoke
First picot connection: knit 2VP, remove the hook from the loop, insert the hook into the picot you want to join (from the front side), then pick up the removed loop and pull it through the picot; tie 2 VPs and finish with a picot of the attached motif.
The second picot is attached in the same way as the first; third picot: knit 1 VP, then knit a double crochet in a picot to the attached motif (crochet into the picot from the wrong side), then knit 1 VP and finish with a picot of the attached motif.

Then we make fans between the hearts according to the pattern, each fan separately with a thread torn off.
Scheme of the yoke pattern (between the hearts)


You can fill it with fans without interruption:
Continuous diagram of the yoke pattern (between the hearts)

Then we knit the first circular row at the yoke (purple color in the diagram) with a ruffle or mini-frill (blue color).
Next we knit strips of “hearts”:
1A – stripe of 4 motifs – Asian sprout
2 – stripe – 10 motifs
We return to tying the yoke with a connecting row (green in the diagram). When connecting the yoke with stripes, we knit mini fans - 4Dc - in the middle of each group of 4Dc from the previous row (purple color).
Don’t forget to decorate the intermediate (connecting) strip with a mini frill on both sides.
Connection of yoke with strip 2

We attach strip 1A to the back yoke - a sprout consisting of 4 motifs.

We attach part of strip 2 (4 motifs) to the front yoke, placing the hearts in a checkerboard pattern.


Strip connection diagram:

Connection of strips

Frill pattern (mini ruffle):

Next, we knit a leveling row of double crochets (black in the diagram) on stripe 1A – sprout and join stripe 2 (4 motifs) on the back, also in a checkerboard pattern.
Next we knit the main fabric of the dress.
The number of motifs in stripes is indicated in the photo.
2-3-5- stripe - 10 motifs
4 – stripe – 9 motifs
6 – stripe – 11 motifs
7-12 stripe – 12 motifs

Scheme for connecting stripes when moving from more motifs to fewer

Scheme for connecting stripes when moving from fewer to more motifs:

We connect according to the scheme for connecting the stripes, only: each fan is connected to a pico of a heart (do not forget to initially place the stripes so that the hearts are located in a checkerboard pattern in front).
You can use this principle:
The easiest way is to initially connect the places of future connections of the tapes with markers, evenly distributing them across the tapes.
Initially, connect the ribbons with a marker in the place where you will have the front, so that the hearts are positioned clearly in a checkerboard pattern. Then connect the tapes to each other in opposite places of the tapes. This will give you marks for connecting the front and back. Then we divide the distances between the front and back exactly in half and connect the ribbons in these places with markers - we connected the sides. Gradually, by dividing the pieces of tape in half, we connect the tapes with markers to each other. When knitting a connecting row, we connect the ribbons in places with markers.

We tie the neck of the dress.
We knit a chain from VP, fitting the neckline. We cling to the sc to the picot on the “heart motif”. In the middle of the motif, to align the neckline, we knit a DC.
Next, in the next circular row, 3DC in each arch of the previous row.
We finish tying the neckline with a mini frill.
We decorate the beginning of the neckline with a ruffle, clinging the sc to the chain from the VP of the first row of processing.

We tie the armholes.
Processing the armholes is similar to tying the neckline.
The binding line is from the back yoke - along the sprout line - undercuts in the armhole - to the front yoke.
Asian sprout binding on the back

Trimming the hem in the armhole

Front armhole binding

The underdress is stretch crepe chiffon. The lining is sewn to the neckline and armholes. Additionally, motifs are fixed at the waistline.

Thank you for watching!
Related posts
2 Comments
Leave a Reply Cancel reply
About the Author
Welcome !
My name is Lilia. The main hobby of my life is knitting. I started with knitting needles and switched to a knitting machine. In 1988 I got acquainted with crochet - Romanian lace. About 10 years ago I became interested in Irish lace and Shetland knitting. And now I’m trying fillet crochet. On this site I want to share with you my 45 years of experience in various knitting techniques.
Latest publications
Кардиган «Цветочные пряники»
Пуловер ВАВЕТТ
Seamless pullover with braid pattern
Blog Subscription
Be the first to receive new items!


Lilechka, you are amazing! A perfectionist in everything! Even your presentation of the material is special! The soul rests on your site! Thank you for the beauty! Health and all the best!
Thank you very much. A huge amount of work has been done...Everything is clear
Clear and understandable