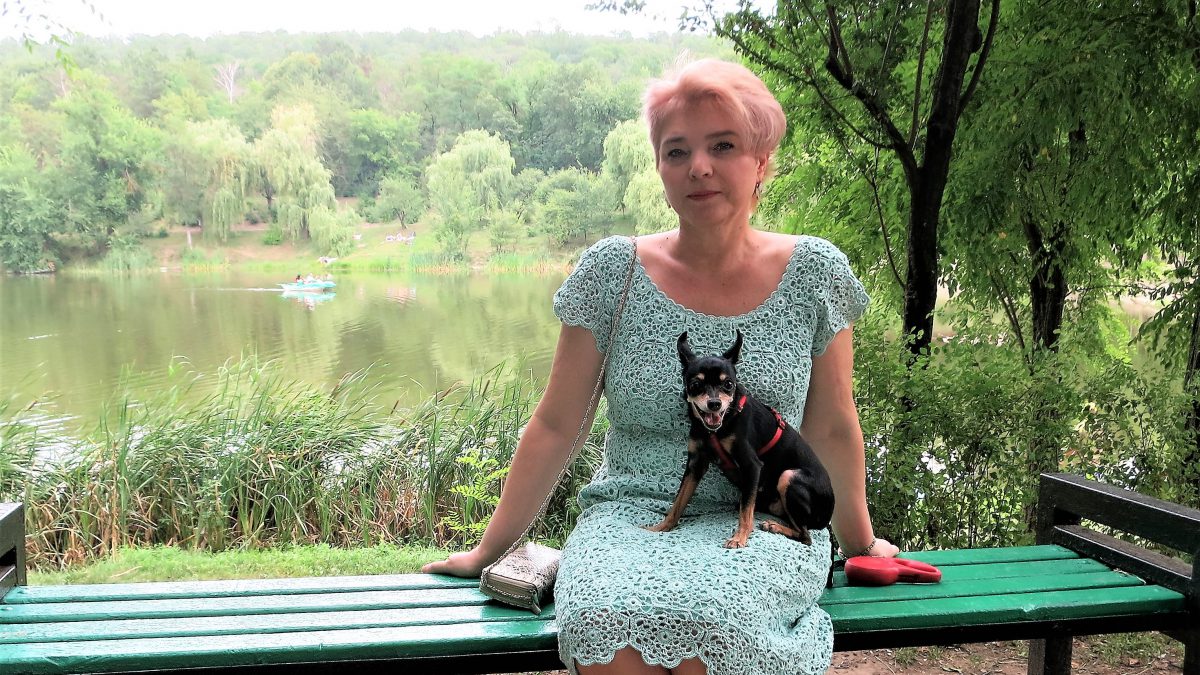
Incredibly beautiful flower circles in skillful hands turn into a chic dress. In the current summer season, this model looks unusually romantic and feminine.

The dress is knitted from Turkish yarn Sarmasik 200m/50g – 500g, turquoise color with lurex:
- cotton 60%
- acrylic 20%
- viscose 20%
Clover hooks No. 2.0-2.25-2.5 were used for knitting.
Size 46-48 required 600 g of yarn.

The following abbreviations are used to describe the work:
VP - air loop
Runway - air lift loop
СС – connecting post
RLS - single crochet
Dc - double crochet
The dress is knitted from individual motifs with a thread torn off.
Octagonal floral motif No. 1

Scheme of motive No. 1

Crochet motif No. 1 according to the pattern or description given below, with crochet No. 2.25. The width of the motif is 8 cm.
Row 0 (black) – 8VP
Row 1 (red) – 3 runways, 23 dc = 24 dc
2nd row (black color) – 3rd runway, * skip 2 dc of the previous row, skip the dc in the 3rd dc of the previous row, 5vp, dc in the same 3rd dc of the previous row, * – repeat 7 times, skip 2 dc of the previous row, DC in the 1st DC of the previous row, 5VP, SS in the 3rd VP, SS.
3rd row (red color) – we knit in each arch: * 3 VPP (instead of CCH), CCH, 5 VP,
2СН,* – repeat 8 times, SS to the 3rd runway.
4th row (black color) – * 3RW (instead of DC), knit in an arch: 5CCH, VP, 5CCH *, – repeat 8 times, SS in the 3rd RW.
Octagonal floral motif No. 2

Scheme of motive No. 2

Octagonal motif No. 2, hook No. 2.5, motif width – 9 cm
Description for motive diagram No. 2:
We knit the first three rows similarly to motif No. 1
Row 4 (black) – * 3RW (instead of DC), knit in an arch: 2RW, 6VP, 2RW, *- 8 times, SS in the 3rd RW.
Row 5 (red color) – * 3RW (instead of DC), knit in an arch: 5CCH, VP, 5CCH *, – repeat 8 times, SS in the 3rd RW.
Diagram of a small connecting motif

Description of the connecting motif:
Row 0 – 8VP
Row 1 – 3 runways, 23 dc = 24 dc
2nd row – connection with motifs –* RLS, 2VP, RLS, 2VP,* – 8 times, SS.
Before starting work, make a life-size pattern of the product.
Numbering of stripes of motifs for easy description of knitting


Arrangement of motifs on the shelf

Arrangement of motifs on the back

Knitting starts with a strip of motifs No. 5, which is located above the waist line.
We crochet No. 2.25 all the stripes of the top of the dress. The photo shows the numbering of the stripes and the location of the motifs.
We follow the diagram for the arrangement of motifs. We connect the RLS motifs while knitting the last row. The connection points are indicated in yellow in the diagram of motif No. 2.
Lane No. 5 – 12 motifs according to scheme No. 1 are closed in a circle.
Arrangement of motifs along the front and back neckline


Next strip number 4 consists of the following motives:
– motive No. 1 – 4;
– motif No. 2 – 3 (these motifs are located on the shelf and act as a recess);
– motive No. 3 – 2 (cutout on the back);
– motive No. 4 – 1 (cutout on the back);
– motif No. 5 – 2 (armhole undercut).
Scheme No. 4 of an incomplete motif for the neckline

Scheme No. 3 of an incomplete motif for the neckline


Scheme No. 5 of the motif for the hem and the connection diagram of the sleeve in the armhole

Next we knit strip number 3 – separate front and back:
– motive No. 1 – 4;
– motive No. 3 – 2 (front neck);
– motive No. 4 – 1 (front neck).
Motif strip No. 2 – these are 4 motifs, connected according to pattern No. 1, forming the front and back straps.
Lane No. 1 – 2 motifs according to scheme No. 1 – one for each shoulder.
Further knitting sleeves – 4 motives according to scheme No. 2. Two motifs for each sleeve.
We move on to filling the canvas with small connecting motifs.
Along the front neckline we knit halves of connecting motifs.
The photo in red shows schematically all the variants of connection motifs.

When attaching the sleeves, in the place where the armhole is cut, we knit three connecting motifs. We look at the photo and knit according to the pattern (see pattern for motif No. 5).
Arrangement of motifs on the side seam line


Along the shoulder line, for a better fit of the sleeves, we knit three small connecting motifs. The connection pattern on the shoulders repeats the connection pattern of the sleeve in the armhole.

We tie the front and back neckline with crochet number 2.0mm as follows:
1st row – RLS;
2nd row –* RLS, skip 1 RLS from the previous row, 5 RLS in one RLS base, skip 1 RLS*, repeat, RLS.

Let's move on to knitting the skirt of the dress.
We knit strips of motifs, simultaneously connecting the motifs in the strip and joining the knitted fabric.
Strip No. 6 – 12 motifs in a strip according to pattern No. 1, hook No. 2.5mm
Stripes No. 7 - 10 – 12 motifs according to pattern No. 2, hook No. 2.5mm
Strip No. 11 – 12 motifs according to pattern No. 2, hook No. 2.25mm
Strip No. 12 – 12 motifs according to pattern No. 2, hook No. 2.0mm
We knit small connecting motifs into the finished fabric.
We decorate the front and back neckline with beads.

Embroider small connecting motifs along the high waistline with beads.

The underdress is made of stretch crepe chiffon and sewn along the neckline and waistline.
The dress is ready!
Thank you for watching!

Related posts
About the Author

Welcome !
My name is Lilia. The main hobby of my life is knitting. I started with knitting needles and switched to a knitting machine. In 1988 I got acquainted with crochet - Romanian lace. About 10 years ago I became interested in Irish lace and Shetland knitting. And now I’m trying fillet crochet. On this site I want to share with you my 45 years of experience in various knitting techniques.
Latest publications
Патентный жакет с «косами» BANTU
Пуловер Elody
Кардиган с узором из «кос» на рукавах
Пуловер Félicie
Джемпер Natural
Blog Subscription
Be the first to receive new items!


