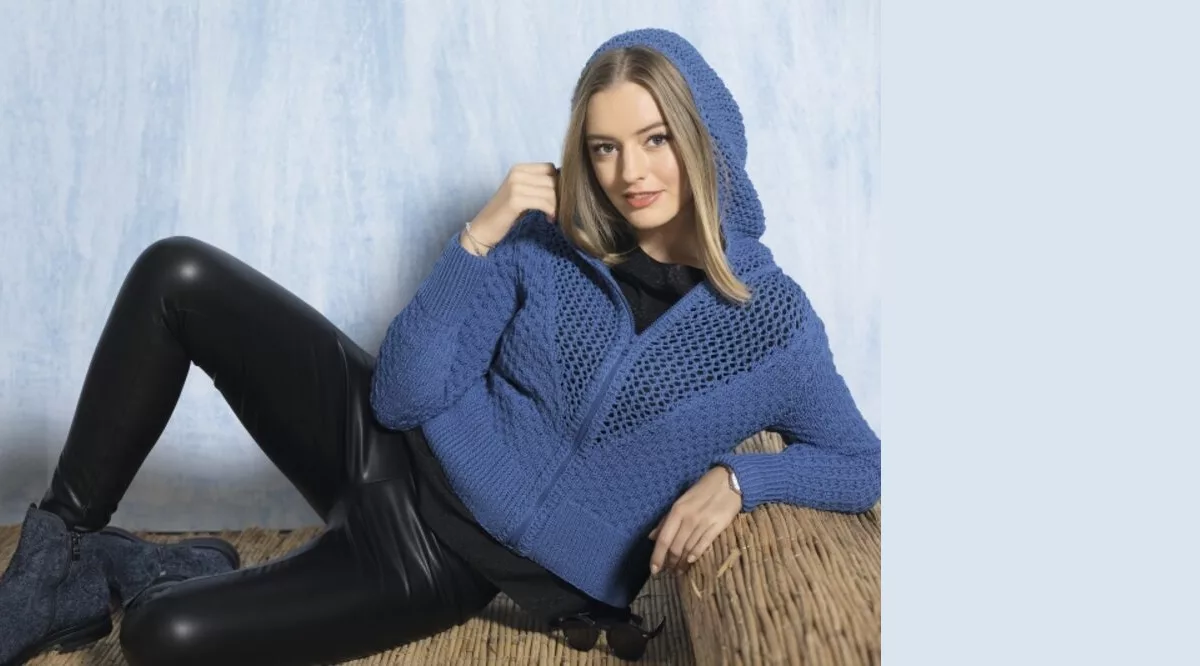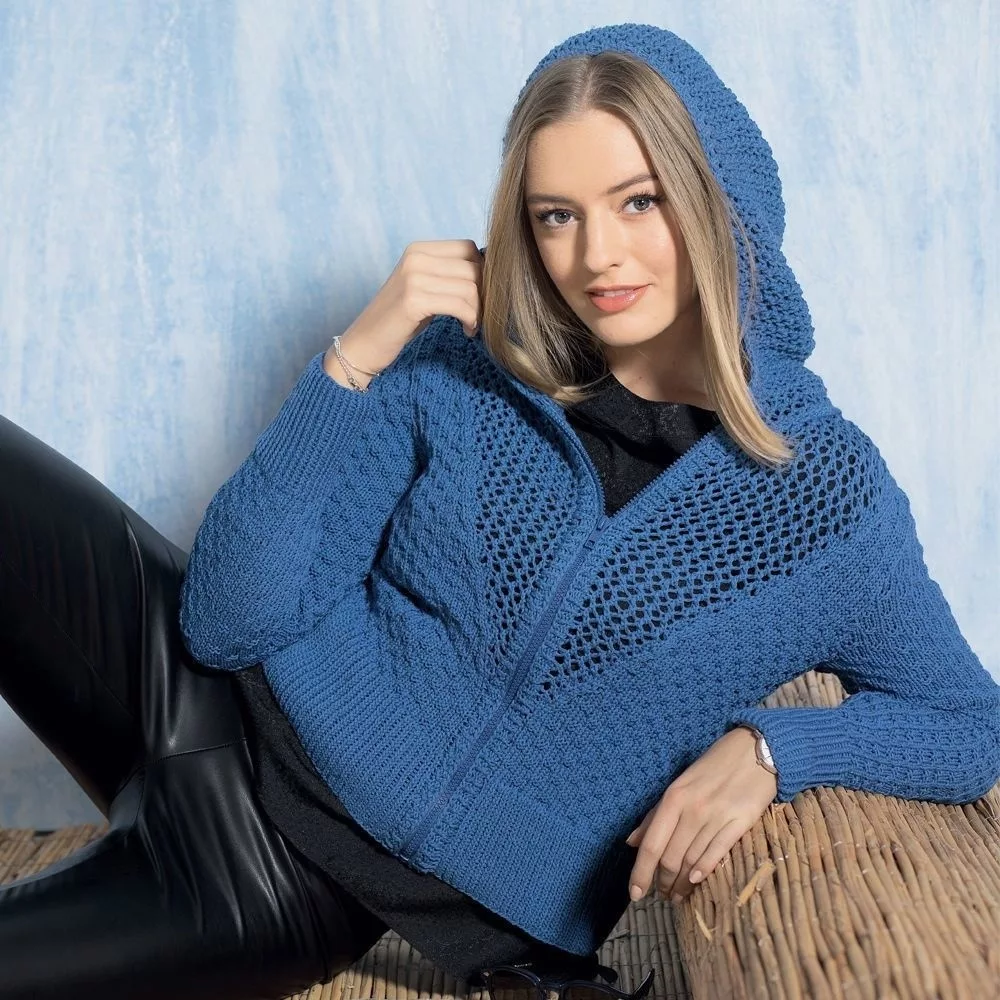
A hooded jacket that combines a simple structured pattern with mesh panels. Wide ribbed trims and a color-matched zipper complete the look.
Dimensions
34/36 (38/40) 42/44

YOU WILL NEED
Yarn (50% cotton, 50% natural wool; 155 m/50 g) - 450 (500) 550 g blue; knitting needles No. 3 and 3.5; long circular knitting needles No. 3; blue detachable zipper, 45 cm long.
PATTERNS AND DIAGRAMS
RUBBER
Even number of loops. knit with needles No. 3 = edge, alternately 1 knit crossed, 1 purl, edge. In the purl rows, knit the loops according to the pattern, knit the knit stitches crossed with the purl stitches crossed.
Knit subsequent patterns on knitting needles No. 3.5.
STRUCTURAL PATTERN
The number of loops is a multiple of 6 + 4 + 2 edge loops = knit according to. diagram 1. It shows the front and back rows. Start with 1 edge loop and loop before the repeat, repeat the repeat all the time, finish with loops after the repeat and 1 edge stitch. Repeat rows 1-6 constantly.

Yoke with mesh pattern A (initially with 3 loops)
Knit according to diagram 2. It shows the facial rows. In purl rows, purl all loops and yarn overs. Perform rows 1-40 once = 14 stitches of yoke. Then continue the yoke up according to. pattern, while expanding the yoke * 3 times in every 4th row and 1 time in the next 2nd row by 1 loop to the right, respectively, from * constantly repeat until the yoke ends before the shoulder bevel or at the shoulder bevel, respectively.

Yoke with mesh pattern B
Knit like yoke with mesh pattern A, but in a mirror image, i.e. expand the yoke to the left. To do this, perform all crossings to the left (= leave 2 loops on the auxiliary needle before work, knit the next loop, then knit the loops from the auxiliary needle) and, starting from the 5th row, read the loops of the pattern from left to right.
MESH PATTERN
Even number of loops.
1st row (= front row): edge, 1 knit, * 1 yarn over, knit 2 loops together with a tilt to the left (see legend), from * constantly repeat, finish 1 front, edge.
2nd and 4th rows: purl the loops and yarn overs.
3rd row: edge, knit 1, * knit 2 stitches together with a tilt to the left, 1 yarn over, from * repeat constantly, finish with knit 1, edge.
Constantly repeat rows 1-4.
KNITTING DENSITY
25 p. x 35 r. = 10 x 10 cm, knitted with a structural pattern;
18 p. x 34 r. = 10 x 10 cm, knitted with a mesh pattern.
ATTENTION
Yokes with a mesh pattern expand the shelves. This is not taken into account on the pattern, since the width is adjusted when sewing the seams and sewing in the zipper. Therefore, the pattern is calculated according to. knitting density of the structural pattern.

Completing of the work
BACK
Cast on 150 (162) 174 stitches on the knitting needles and for the peplum knit 9 cm with an elastic band, while in the last purl row, evenly distributed, decrease 54 sts = 96 (108) 120 sts.
Continue working with the structural pattern.
After 20.5 cm = 72 rows from the peplum, close off 1 x 4 stitches for the armholes on both sides, then in every 2nd row close off 3 x 2 stitches and 2 x 1 stitches = 72 (84) 96 stitches.
After 37 cm = 130 rows (39 cm = 136 rows) 40.5 cm = 142 rows from the peplum, close for the shoulder bevel on both sides 1 x 4 (5) 6 p., then in every 2nd row close 1 x 4 (5) 6 p. and 1 x 5 (6) 7 p.
Simultaneously with the 1st decrease for the shoulder, close the middle 28 (32) 36 stitches for the neckline and finish both sides separately.
To round the inner edge, cast off 2 x 2 stitches in every 2nd row.
After 39 cm = 136 rows (40.5 cm = 142 rows) 42.5 cm = 148 rows from the peplum, close off the remaining 5 (6) 7 stitches of the shoulders.
LEFT SHELF
Cast on 74 (80) 86 stitches on the knitting needles and for the peplum knit 9 cm with an elastic band, while in the last purl row, evenly distributed, decrease 26 sts = 48 (54) 60 sts.
Continue working with the structural pattern.
After 5 cm = 18 rows from the peplum on the last 3 stitches before the edge, start knitting a yoke with a mesh pattern A and expand according to. instructions.
At the same time, make an armhole along the right edge, as on the back = 36 (42) 48 sts.
After 35.5 cm = 124 rows (37 cm = 130 rows) 39 cm = 136 rows from the peplum, close off for the neckline on the left edge 1 x 8 (10) 12 p., then in every 2nd row close off 1 x 3 p. ., 2 x 2 p. and 3 x 1 p.
At the same time, make a shoulder bevel along the right edge, as on the back. At the height of the back, bind off the remaining 5 (6) 7 stitches of the shoulder.
RIGHT SHELF
Knit the same as the left front, but in a mirror image and a yoke with a mesh pattern B instead of A.
SLEEVES
Cast on 62 (68) 74 stitches on the knitting needles for each sleeve and knit 9 cm with an elastic band for the placket, while in the last purl row, evenly distributed, decrease 8 sts = 54 (60) 66 sts.
Continue working with the structural pattern.
To bevel the sleeves, add on both sides in every 12th row from the bar 8 x 1 p. (alternately in every 10th and 12th row 10 x 1 p.) alternately in every 8th and 10th r. 12 x 1 p. acc. pattern = 70 (80) 90 p.
After 32.5 cm = 114 rows from the bar, close off the sleeves on both sides with 1 x 4 stitches, then in every 2nd row close 2 x 2 stitches, 17 x 1 stitches and 2 x 2 stitches.
After 45 cm = 158 rows from the bar, close off the remaining 12 (22) 32 sts.
HOOD
Knit the hood crosswise, starting from the front edge. Arrow on pattern = knitting direction. Cast on 126 stitches and knit 1 purl row; this series is not taken into account in subsequent calculations.
Continue working with a mesh pattern.
After 20 cm = 68 rows (21 cm = 72 rows) 22.5 cm = 76 rows from the starting row, bind off 1 x 10 stitches on both sides, then bind off 4 x 10 stitches in every 2nd row.
After 23 cm = 78 rows (24 cm = 82 rows) 25.5 cm = 86 rows from the bar, continue working for the back of the hood on the remaining 26 loops in a mesh pattern.
After 51 cm = 174 rows (52 cm = 178 rows) 53.5 cm = 182 rows from the starting row, cast off all stitches.
ASSEMBLY
Sew the shoulder seams, press the shoulder edges of the shelves in the area of pattern 5 slightly. Sew the seams of the hood by sewing the side edges of the back of the hood to the beveled closed edges. Sew the hood into the neck, fitting it accordingly.
For the strips of shelves on the front side of the work, cast on 94 (98) 102 loops on circular knitting needles along the sides of the shelves and the edges of the peplum, between them cast on 127 loops along the edge of the hood and knit with an elastic band on all 315 (323) 331 stitches, in 1 On the purl row between the edges, start and finish with 1 purl crossed. After 1.5 cm = 3 rows from the set of loops, close the loops according to the drawing.
For the zipper strap, cast on the sides of both shelves on the inside of the work along the initial edges of the strips from/to the bottom edge of the peplum by 45 cm, 95 loops each and knit with an elastic band, while in the 1st purl row between the edges, start and finish with 1 purl crossed . After 1.5 cm = 3 rows from the set of loops, close the loops according to the drawing.
Sew in the sleeves, sew side seams and sleeve seams. Sew the zipper from the bottom edge of the peplum between the front strip and the zipper strip.
Related posts
About the Author
Welcome !
My name is Lilia. The main hobby of my life is knitting. I started with knitting needles and switched to a knitting machine. In 1988 I got acquainted with crochet - Romanian lace. About 10 years ago I became interested in Irish lace and Shetland knitting. And now I’m trying fillet crochet. On this site I want to share with you my 45 years of experience in various knitting techniques.
Latest publications
Ажурный пуловер ILARIA
Кардиган Cloud Peak
Blog Subscription
Be the first to receive new items!

