Today, the scarf theme is one of the most popular and in demand. The versatility and convenience of a transformable scarf will keep it on the pedestal of modern fashion for a long time.

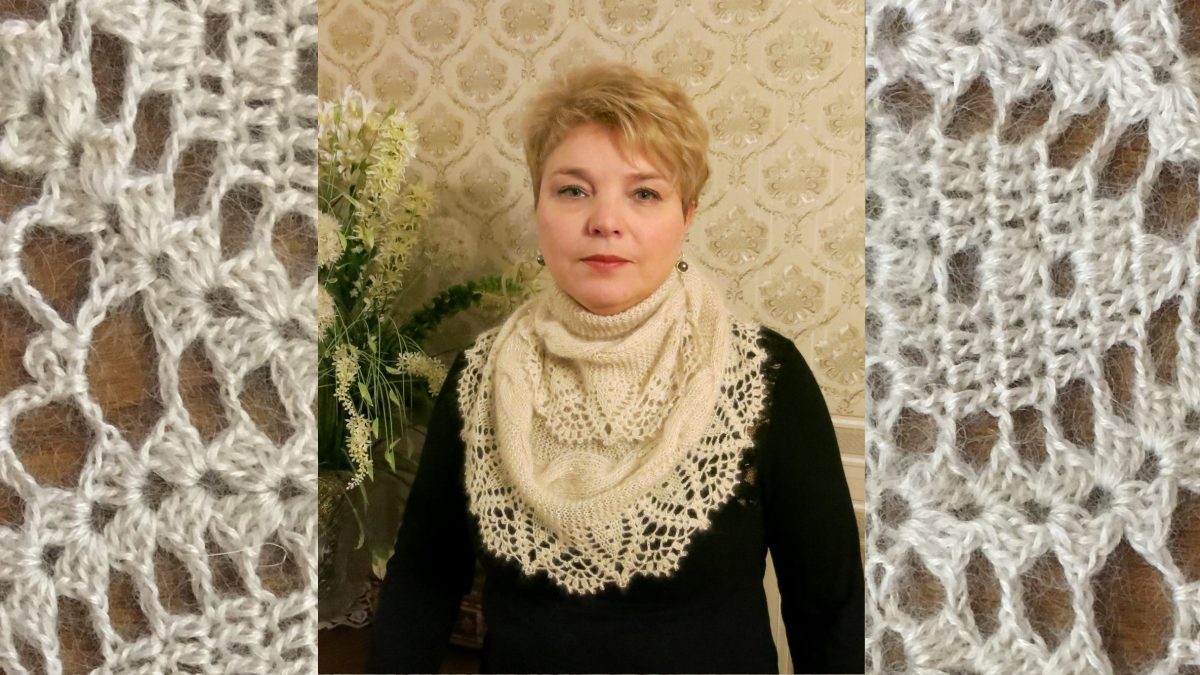
A romantic and, at the same time, very practical and warm snood scarf.
Crocheting or knitting a snood is as easy as shelling pears. To do this, you will only need basic knitting skills. Don't be embarrassed to add something fresh and original to your look by wearing a new colorful snood scarf from the latest collections.
Its main part is knitted using knitting needles, and a crochet hook is used to knit lace.
Yarn Camelot 1000m/100g – in two threads
Knitting needles No. 3.0
Hook No. 0.5 – 2.0mm
Transparent beads No. 6
Weight of the finished product with beads – 105g

Here is a diagram of the main part of the snood, which is knitted with knitting needles:

You can pick up the loops with another thread, so that when you tie the scarf, open the loops and sew the edges with a knitted seam. But you can knit right away with a working thread, everyone decides for themselves.
Description of knitting snood
Cast on 54 sts on the waste thread (i.e. open cast-on).
1st row: knit 10 sts in garter stitch (= knit only in knit stitches), *2 knit stitches, 2 purl stitches**, repeat *…** 6 times, 20 sts in garter stitch ( note: edge stitches are already included in the pattern, knit in each row).
Row 2: 20 sts in garter stitch, *k2, purl 2**, repeat *…** 6 times, 10 sts in garter stitch.
Repeat rows 1 and 2 6 times.
Next row with overlap: 10 sts in garter stitch, set aside 12 sts on the auxiliary needle for work, *2 knit stitches, 2 purl stitches**, repeat *...** 3 times, then knit stitches with auxiliary needles *k2, p2**, repeat *…** 3 times, then knit 20 sts in garter stitch.
Knit rows 1 and 2 11 times, then knit row 1 (i.e. a total of 23 rows were knitted), repeat the row with an overlap.
Repeat to the desired length, then sew the narrow edges together using a knit stitch.
Knitted seam

Dimensions of the main part of the snood without lace trim – 140 cm x 16 cm

In the photo you can see that the braid is not in the center of the scarf, but you can do it the way you like.
It should also be noted that the edge of the scarf is ribbed, this is done due to the fact that at the end of the row the edge loop is knitted not purl, but knit.
Next we knit the lace part of the snood and crochet it along the edge of the scarf according to this pattern:
Border scheme

Instead of “picot” from 4 VPs, we knit beads.

Just by looking at this snood, we feel a huge flight of fantasy. We ourselves can change the patterns, choose any that we like, and we will get our own, unique snood scarf.
Here are a few more options for tying the openwork part of the snood:
Border scheme No. 1

Border scheme No. 2


Border scheme No. 3

Border scheme No. 4

View of the snood from the front and back sides

Give free rein to your imagination, and you will get an excellent double-sided scarf - a snood!

Related posts
About the Author

Welcome !
My name is Lilia. The main hobby of my life is knitting. I started with knitting needles and switched to a knitting machine. In 1988 I got acquainted with crochet - Romanian lace. About 10 years ago I became interested in Irish lace and Shetland knitting. And now I’m trying fillet crochet. On this site I want to share with you my 45 years of experience in various knitting techniques.
Latest publications
Flowers on fillet lace. Part 3
Flowers on fillet lace. Part 2.
Blog Subscription
Be the first to receive new items!


