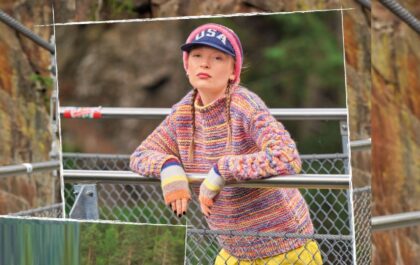
The classic knitted pullover has a rich pattern with cords. The sleeves of the pullover turn into small yokes.
Designer Jenny Williams
Size (bust): 93 (104, 114, 123, 135) cm

You will need: 800 (900, 1000, 1100, 1200) g of silver-gray yarn Cascade Yarns Longwood (100% merino wool, 175 m/50 g); circular knitting needles No. 4.5, approximately 40 and 80 cm long; markers; aux. spoke; aux. a thread.

Patterns
Elastic band 1. The number of loops is a multiple of 3 + 2. 1st row (front side): * P2, slip 1 stitch; repeat from * to last 2 sts, purl 2. 2nd row: * k2, p1; repeat from * to last 2 sts, k2. Repeat rows 1 and 2.
Elastic band 2. The number of loops is a multiple of 3. 1st row (front side): 1 purl, * remove 1 stitch, 2 purl; repeat from * to last 2 sts, slip 1 st, purl 1. 2nd row: k1, * p1, k2; repeat from * to last 2 sts, slip 1 st, purl 1. Repeat rows 1 and 2.
Purl stitch. Persons rows - purl. p., out. rows - persons. P.
Braid pattern. Knit according to patterns.


Knitting density: purl stitch: 20 p. and 33 r. = 10 x 10 cm; “braid” pattern on the front and back: 24 p. and 33 r. = 10 x 10 cm; braid pattern on sleeves: 24 p. = 9 cm.
Attention! When counting sleeve loops, do not count the central loop of the “braid” pattern from the 9th to the 20th row of the pattern. If you are casting off sleeve and shoulder stitches, work the center stitch together with the adjacent stitch as if casting off.

Description of knitting
Back.
On circular needles 80 cm long, cast on 98 (110, 120, 128, 140) sts.
For sizes 93 (104, 123, 135) cm knit 11 rows with rib 1, ending on the front side.
For size 114 cm knit 11 rows with rib 2, ending on the front side.
For sizes 93 (104, 114) cm knit as follows. Row with additions (wrong side): knit 14 (20, 25) sts according to the pattern, adding a loop from the transverse thread tilted to the right (adding a loop from the transverse thread between 2 sts, which is knitted behind the front wall), 10 p. according to the picture, adding a loop with a slope to the right, 4 p. according to the picture, adding a loop with a slope to the right, (4 p. according to the picture, adding a loop with a slope to the right, 15 p. according to the picture, adding a loop with a slope to the right) 2 times , 10 sts according to the pattern, adding a loop with a slant to the right, knit to the end = 108 (120, 130) sts.
Beginning of the braid: next row (front side): 3 (9, 14) purl, place a marker, (slip 1 p., 1 p.) 3 times, place a marker, twisted “braid” at 18 p. according to the diagram, place a marker, central “braid” at 54 p. according to the diagram, place a marker, twisted “braid” at 18 p., place a marker, (1 p., remove 1 p.) 3 times, place a marker, 3 (9, 14) p. Next row (wrong side): knit to marker, move marker, (p1, k1) 3 times, move marker, twisted braid to marker, move marker, center braid to marker, move marker , twisted “braid” to the marker, transfer the marker, (K1, P1) 3 times, transfer the marker, knit stitches to the end of the row.

Only for sizes 123 (135) cm knit as follows. Row with additions (wrong side): knit 9 (15) sts according to the pattern, adding a loop with a slant to the right (adding a loop from a transverse thread between 2 sts, which is knitted behind the front wall), 7 sts according to the pattern, adding a loop with a slant to the right, 13 sts according to the pattern, adding a loop with a slant to the right, knit 10 sts according to the pattern, adding a loop with a slant to the right, knit 4 sts according to the pattern, adding a loop with a slant to the right, (knit 4 sts according to pattern, adding a loop with a slant to the right, 15 sts according to the pattern, adding a loop with a slant to the right) 2 times, (knit 4 sts according to the pattern, adding a loop with a slant to the right) 2 times, knit 10 sts according to the pattern, adding a loop with slanted to the right, 13 sts according to the pattern, adding a loop slanted to the right, 7 sts according to the pattern, adding a loop slanted to the right, knit to the end = 142 (154) sts.
Beginning of the braid: next row (front side): 8 (14) purl, place marker, (slip 1 stitch, purl 1) 2 times, (slip 1 stitch, purl 3) 2 times, (slip 1 stitch, 1 p.) 3 times, place a marker, twisted “braid” on 18 sts of the diagram, place a marker, central “braid” on 54 sts of the diagram, place a marker, twisted “braid” on 18 sts of the diagram, place a marker, ( P1, slip 1 stitch) 3 times, (P3, slip 1 stitch) 2 times, (P1, slip 1 stitch) 2 times, place marker, P8 (14). Next row (wrong side): knit to the mark, transfer marker, (P1, K1) 2 times, (P1, K3) 2 times, (P1, K1) 3 times , move the marker, twisted braid to the marker, move the marker, central braid to the marker, move the marker, twisted braid to the marker, move the marker, (K1, P1) 3 times, (K3). , 1 p.) 2 times, (1 knit., 1 p.) 2 times, transfer the marker, knit until the end of the row.

For all sizes: work straight to 44.5 (44.5, 44, 44, 43) cm from the cast-on edge, ending with a purl row.
For armholes, close off at the beginning of the next 4 rows 4 sts = 92 (104, 114, 126, 138) cm. Knit straight for another 19 (19, 19.5, 19.5, 20) cm (= armhole height), ending with purl near. Cast off all stitches according to the pattern and at the same time knit 2 stitches together. 10 (10, 10, 14, 14) times evenly in a row.

Before.
Knit as for the back, to an armhole height of 16.5 (16.5, 17, 17, 17.5) cm, ending with a purl row.
For the neckline, knit 28 (34, 36, 41, 46) sts, join yarn from another skein, cast off 36 (36, 42, 44, 46) sts, knit to end of row = 28 (34, 36, 41) , 46) p. of each shoulder.
Continue knitting both halves separately, knitting 1 purl row without decreasing. Decrease row (front side): knit up to 4 stitches from the edge of the neckline, 3 stitches together, knit 1, in the second half: knit 1, double decrease (slip 1 stitch as knit, 2 sts knit together and pull the resulting loop through the removed one), knit to the end = 26 (32, 34, 39, 44) sts on each half.
Knit directly according to the pattern to an armhole height of 19 (19, 19.5, 19.5, 20) cm, ending with a purl row.
Close all the loops according to the pattern and at the same time evenly knit 2 stitches together. 4 times on each half.

Sleeves.
On circular needles 80 cm long, cast on 44 (48, 48, 50, 50) sts.
For sizes 93 (123, 135) cm knit 9 rows with rib 1, ending on knit. side. For sizes 104 (114) cm knit 9 rows with rib 2, ending on knit. side.
For all sizes knit as follows.
Inc. row (wrong side): 20 (22, 22, 23, 23) sts, inc with a slant to the right, knit 4 sts, inc with a slant to the right, knit to the end = 46 (50, 50, 52 , 52) p.
Next row (front side): 11 (13, 13, 14, 14) purl, place a marker, knit in a “braid” pattern for 24 sts according to the diagram, place a marker, purl stitches to the end of the row.
Next row (wrong side): knit stitches to marker, move marker, braid to marker, move marker, knit stitches to end of row.
Knit 1 front row straight.
Row with increases (wrong side): 1 knit, increase a loop with a slant to the left (knit from a cross thread knit behind the back wall), knit until the last loop, add a loop with a slant to the right, 1 knit. = increase 2 p.
Repeat the row with increases in every 10 (10, 10, 8, 8) row another 12 (12, 4, 15, 7) times, then in every 0 (0, 8, 0, 6) row 0 ( 0, 10, 0, 11) times = 72 (76, 80, 84, 90) p.
Knit straight until the sleeve reaches a height of 43 (44.5, 44.5, 44.5, 45) cm from the cast-on edge, ending with a purl row.
For raglan, close at the beginning of the next 2 r. 5 (5, 6, 7, 8) p. = 62 (66, 68, 70, 74) p.
Decrease row (front side): 2 sts together, knit until last 2 sts, decrease stitch = decrease 2 sts.
Repeat dec row on each RS row another 16 (18, 19, 20, 23) times, then on every 4th row 2 (2, 2, 2, 1) times = 24 sts.
Insert.
Knit straight (the edges are knitted in purl stitch) to a height of 11 (13, 15, 17, 18) cm from the top of the raglan, ending with the purl row.
Right sleeve only: next row (front side): cast off 17 sts, purl until last 3 sts, remove 1 st, purl 2. = 7 p. Next row (wrong side): k2, p1, k4. Next row (front side): purl 4, slip 1 stitch, purl 2. Knit straight until the insert reaches 9 (9, 10, 10, 11) cm. Transfer the loops to the auxiliary. knitting needle
Left sleeve only: take 1 front row straight (no decreases).
Next row (wrong side): cast off 17 sts, knit until last 3 sts, purl 1, k2. = 7 p. Next row (front side): 2 p., remove 1 p., 4 p.
Next row (wrong side): k4, p1, k2. Knit straight until the insert reaches 9 (9, 10, 10, 11) cm. Place the stitches on the aux. knitting needle

Assembly.
Sew side seams and sleeve seams.
On the front side, using a knitted seam, sew the insert.
Sew in the sleeves, making sure the left and right sleeves are positioned correctly. Sew the back edge of the sleeve insert to the back neckline and shoulder edge, joining to the center of the back.
Sew the front edge of the sleeve insert to the front shoulders.
Neck trim: starting from the seam of the left front insert, on 40 cm long circular needles, cast on 42 (42, 48, 51, 51) sts along the front neckline, 15 sts along the closed edge of the right insert, 45 (45, 51, 54, 54) sts along the edge of the back neckline insert and 15 sts along the closed edge of the left insert = 117 (117, 129, 135, 135) sts.
Place a marker and close it in a circle.
Next circular row: P1, * slip 1 st, purl 2, repeat from * to last 2 sts, slip 1 p, purl 1.
Next round: P1, * K1, P2, repeat from * to last 2 stitches, K1, P1.
Repeat the last 2 rounds 5 more times. Bind off all stitches. Hide the ends of the threads.
Related posts
About the Author

Welcome !
My name is Lilia. The main hobby of my life is knitting. I started with knitting needles and switched to a knitting machine. In 1988 I got acquainted with crochet - Romanian lace. About 10 years ago I became interested in Irish lace and Shetland knitting. And now I’m trying fillet crochet. On this site I want to share with you my 45 years of experience in various knitting techniques.
Latest publications
Жаккардовый пуловер леопардовым узором BUDDIE
Пуловер ВАВЕТТ
Пестрый пуловер с «косами» BASTIA
Blog Subscription
Be the first to receive new items!


