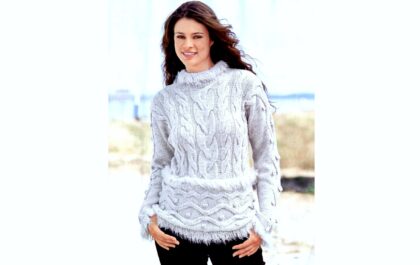
The jumper can be knitted in two strands of DROPS Kid-Silk yarn or in 1 strand of DROPS Brushed Alpaca Silk yarn. The jumper has a round yoke with a leaf pattern and raglan lines.
Dimensions: S – M – L – XL – XXL – XXXL

You will need:
Yarn DROPS KID-SILK (75% kid mohair, 25% silk, 210m/25g)
200-225-225-250-275-300 g, color 36, bordeaux
or yarn DROPS BRUSHED ALPACA SILK (77% alpaca, 23% silk, 140m/25g)
175-200-200-225-225-275 g, color 23, bordeaux
Spokes:
Circular knitting needles DROPS size 5 mm, line length 40 cm and 60-80 cm for stockinette stitch.
Circular knitting needles DROPS size 4 mm, line length 60-80 cm for elastic.
Double needles DROPS size 5 mm
Double needles DROPS size 4 mm
For knitting, you can use the MAGIC LOOP technique - in this case you will need circular knitting needles on 80 cm fishing line of all specified sizes.
Knitting density: 17 sts and 22 rows in stockinette stitch (2 strands of Kid-Silk or 1 strand of Brushed Alpaca Silk) = 10 x 10 cm
EXPLANATIONS FOR KNITTING:
PATTERN:
See diagrams A.1 and A.2. Choose a pattern for your size (refers to A.2).


UNIFORM DECREASES / INCREASES:
To calculate the rhythm of performing uniform decreases/increases, the total number of stitches in the row (for example, 190 stitches) is divided by the number of decreases/increases that must be made (for example, 6) = 31.7.
In this example, for decreasing, knit together with a slant to the right alternately every 30th and 31st loops and 30th and 31st loops.
To increase, make 1 yarn over alternately after every 31st stitch and 32nd stitch. In the next circular row, knit yarn overs with crossed loops so that there are no holes.
RAGLAN:
Add 1 stitch on each side of 4 stitches with markers (at each transition from front/back to sleeves) = add 8 stitches per 1 round row. Increase = 1 yarn over. In the next circular row, knit the yarn over with a crossed knit stitch so that there is no hole. The added stitches are then knitted in stockinette stitch.
DECREASES ON SLEEVES:
Decrease 1 loop on each side of the marker like this: knit until there are 3 loops left before the marker, knit 2 stitches together with a slant to the right, knit 2 (the marker will remain between these 2 loops), knit 2 loops together with a knit slant to the left ( = 2 loops decreased).
TIP FOR CLOSURE LOOPES:
To prevent the closed edge from being pulled, you can use a larger needle size to bind off the stitches. If in this case the edge pulls, during closure you can make 1 yarn over approximately after every 6th loop and close it like a regular loop.

KNITTING DESCRIPTION:
JUMPER, brief description of work:
Knit the neckline and yoke in the round on circular needles, from top to bottom. Divide the yoke into body and sleeves. Knit the body in the round on circular knitting needles, from top to bottom. Knit sleeves in the round on stocking/short circular needles, from top to bottom.
NECK:
Cast on 76-80-84-88-92-96 stitches on 4mm short circular needles using two strands of DROPS Kid-Silk yarn or 1 strand of DROPS Brushed Alpaca Silk yarn. Knit 1 round row with knit stitches.
Then knit pattern A.1 in the round (= 19-20-21-22-23-24 repeats 4 stitches) to a height of 4 cm.
Place 1 marker in the middle of the round (= middle of the front). Next, knit the yoke and measure it from this marker.
YOKE:
Change knitting needles to 5mm circular knitting needles
Work according to pattern A.2 in the round (= 19-20-21-22-23-24 repeats of 4 stitches).
Continue knitting the pattern and make increases as shown in the diagram.
When A.2 is completely knitted vertically, there are 190-200-210-264-276-288 stitches in the row and the yoke length is approx. 10-10-10-15-15-15 cm from the marker on the neck.
Knit 2 circular rows in stockinette stitch and at the same time in the first circular row evenly add 6-0-2-0-4-0 stitches (see knitting instructions) = 196-200-212-264-280-288 stitches.
Now place 4 new markers as described below. These markers will be used to make raglan increases, place the markers without knitting stitches:
count 30-31-33-40-44-46 stitches (= ½ back), place 1 marker on next stitch, count 36-36-38-50-50-50 stitches (= sleeve), place 1 marker on next stitch , count 60-62-66-80-88-92 stitches (= front), place 1 marker on next stitch, count 36-36-38-50-50-50 stitches (= sleeve), place 1 marker on next stitch . There will be 30-31-33-40-44-46 stitches left after the last marker (= ½ back).
Knit in stockinette stitch in the round.
AT THE SAME TIME, make raglan increases in the first round row, see the explanation for knitting (= add 8 loops).
Make raglan increases in every 2nd circular row 0-2-3-0-2-3 times vertically, then in every 4th circular row 5-5-5-5-4-5 times vertically.
After the last increase there will be 236-256-276-304-328-352 stitches on the needles.
Knit in stockinette stitch without increasing until the height of the yoke is 20-22-24-25-27-29 cm from the marker on the neck.
Then divide the yoke into the body and sleeves and knit the last circular row like this:
knit 35-38-41-45-50-54 stitches in stockinette stitch (= ½ back),
slip the next 48-52-56-62-64-68 stitches onto the holder (= sleeve) and cast on 8-8-10-10-12-12 new stitches for cutting,
knit 70-76-82-90-100-108 stitches in stockinette stitch (=front),
slip the next 48-52-56-62-64-68 stitches onto the holder (= sleeve) and cast on 8-8-10-10-12-12 new stitches for cutting
and work the remaining 35-38-41-45-50-54 stitches in stockinette stitch (= ½ back stitch).
Next, knit the body and sleeves separately. FURTHER MEASUREMENTS SHOULD BE MADE FROM THIS PLACE!
BODY:
= 156-168-184-200-224-240 stitches.
Place 1 marker in the middle of the newly cast on 8-8-10-10-12-12 undercut stitches, on the sides.
Knit the back stitches to the marker on the side, now the round starts next to the marker.
Knit in stockinette stitch in the round until 27cm is knitted from the split for all sizes. Remains approx. 4 cm to the final length of the jumper. Try on the product and, if necessary, continue knitting to the desired length.
Next, add loops so that the bottom of the product is not pulled together.
Work 1 round in stockinette stitch and evenly add 24-26-28-30-34-36 stitches = 180-194-212-230-258-276 stitches.
Change the knitting needles to 4 mm circular knitting needles. Knit an elastic band (= k1/p1) to a height of 4 cm. Cast off the stitches according to the pattern, see the tip for casting off the stitches. Jumper length – approx. 54-56-58-60-62-64 cm from shoulder down.
SLEEVE:
Slip 48-52-56-62-64-68 stitches from the holder on one side onto short circular or double needles size 5 mm and in addition pick up 1 stitch over each of the previously cast on 8-8-10-10-12-12 undercut stitches = 56-60-66-72-76-80 stitches.
Place 1 marker in the middle of the undercut, in the middle of the picked up 8-8-10-10-12-12 stitches. Move the marker as you knit; it will be used for decreases at the bottom of the sleeve.
Begin a round next to the marker and work in stockinette stitch in the round.
When you have knitted 3 cm from the point of separation for all sizes, decrease 2 loops at the bottom of the sleeve (1 loop on each side of the marker), see the explanation for knitting.
Make such decreases every 3 cm, for a total of 3-3-3-4-4-4 times vertically = 50-54-60-64-68-72 stitches.
Continue knitting until the sleeve length is 37-36-34-35-33-32 cm from the division point (larger sizes have shorter sleeves due to a wider neckline and a longer yoke).
There is about 6 cm left to the final sleeve length. Try on the product and, if necessary, continue knitting to the desired length.
Work 1 round and evenly decrease 12-14-18-20-22-24 stitches = 38-40-42-44-46-48 stitches.
Change the needles to stocking needles size 4 mm. Knit an elastic band (= k1/p1) to a height of 6 cm. Bind off the stitches according to the pattern. Sleeve length – approx. 43-42-40-40-39-38 cm from the separation point.
Knit the second sleeve as well.
Related posts
About the Author

Welcome !
My name is Lilia. The main hobby of my life is knitting. I started with knitting needles and switched to a knitting machine. In 1988 I got acquainted with crochet - Romanian lace. About 10 years ago I became interested in Irish lace and Shetland knitting. And now I’m trying fillet crochet. On this site I want to share with you my 45 years of experience in various knitting techniques.
Latest publications
Светло-серый свитер с бахромой и поперечным бордюром из «кос»
Пуловер “Léna”
Пуловер Muscari
Blog Subscription
Be the first to receive new items!


