
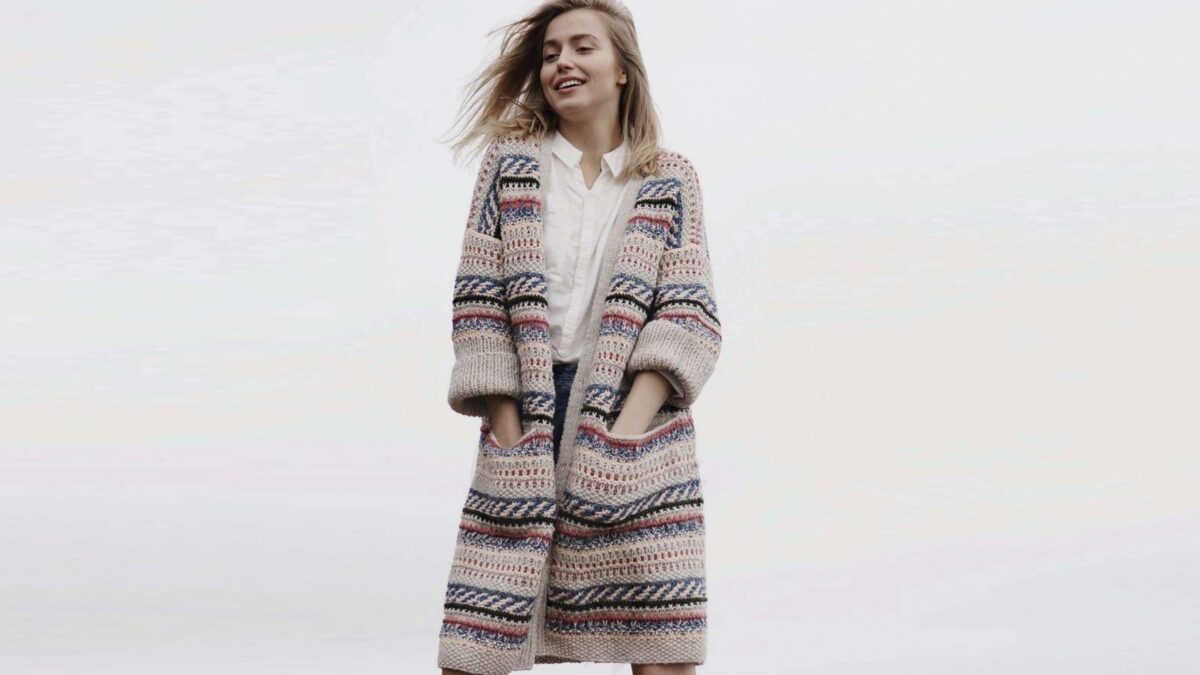

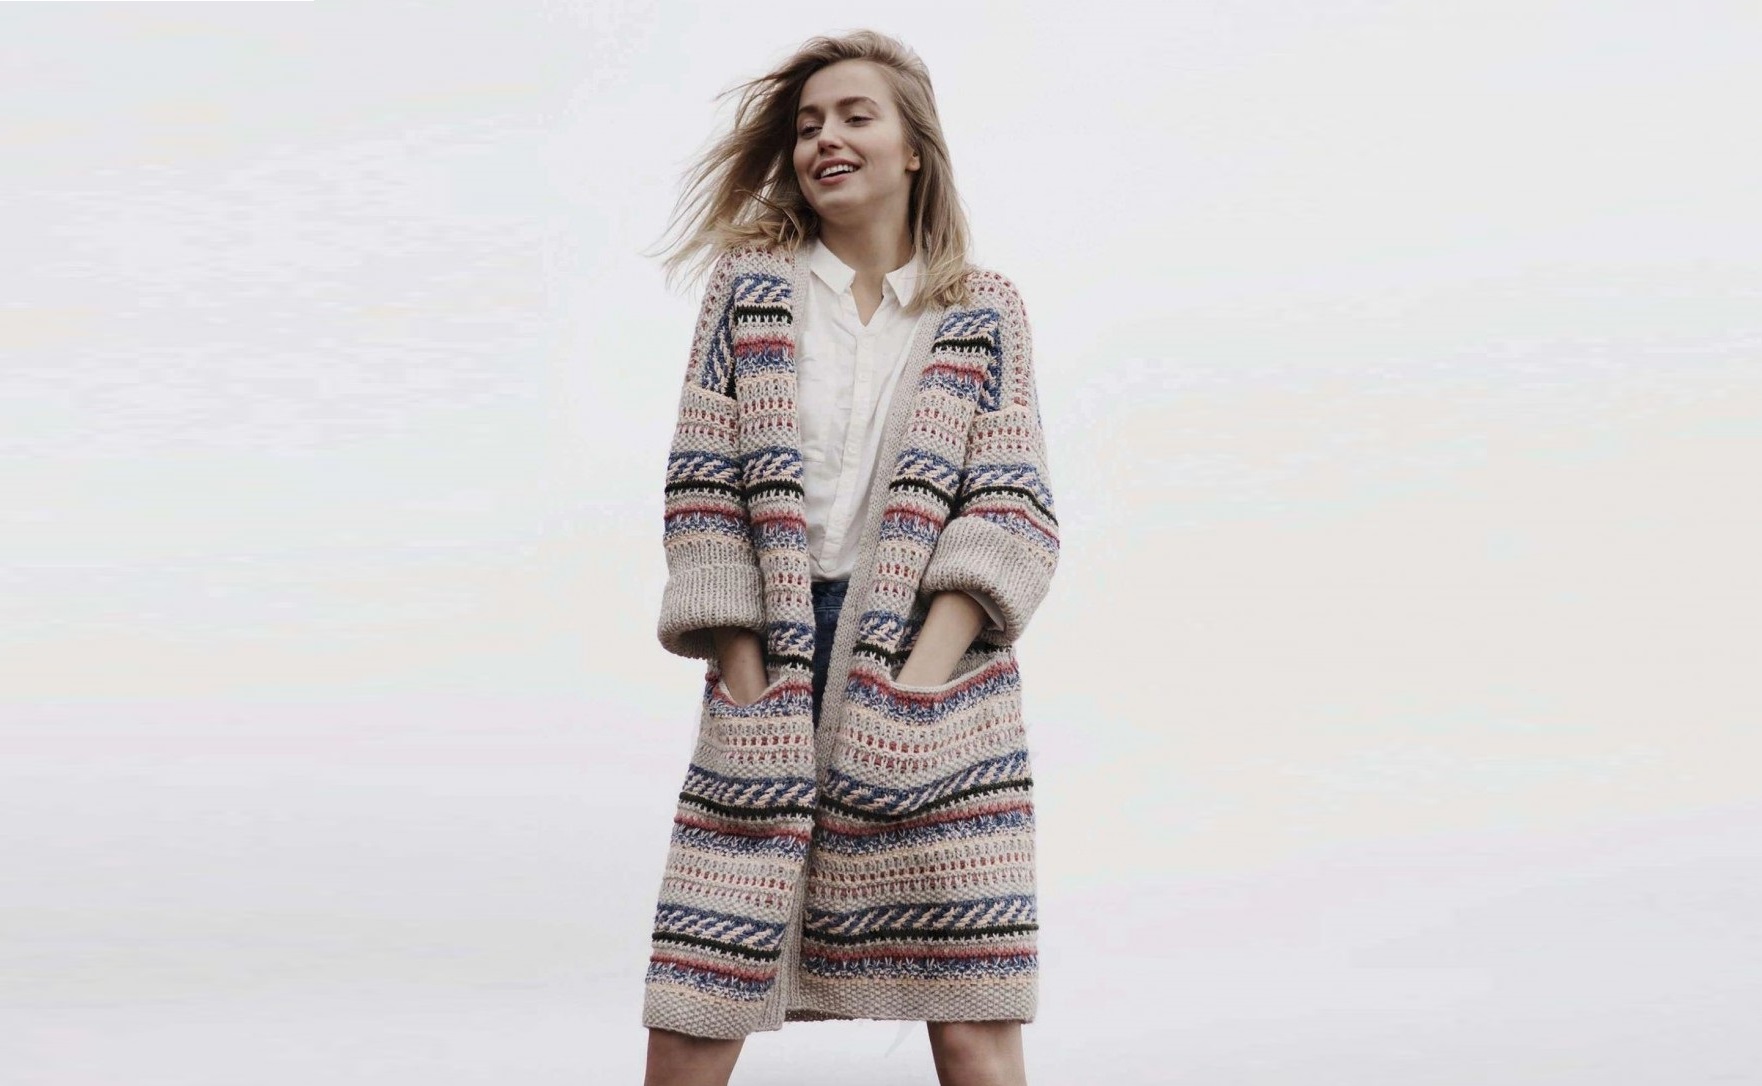
The long cardigan with welt pockets is a typical example of contemporary Scandinavian design, which uses modern ideas while drawing on the historical heritage of the region. The model combines a colored pattern with pearl knitting and broaching threads on the front side of the work, which creates an unusual relief. The basis is taken from two types of yarn from the Finnish brand Novita: pure wool and a mixture of wool and cotton.
Dimensions:


You will need:

Knitting needles and accessories:
Knitting needles No. 6 and 7; 3 buttons; auxiliary knitting needles.
Knitting density:
16 p. x 26 r. = 10 x 10 cm, knitted with a double thread jacquard pattern on knitting needles No. 6.
FEATURES OF THE WORK
Knit the jacquard pattern using stockinette stitch using the jacquard technique, and when changing the color, cross the threads on the wrong side of the work.
SPECIAL SYMBOLS
Decrease 1 st.
Slip off 2 stitches one by one, like knit stitches, then thread the left knitting needle into the removed loops from left to right behind the front walls of these loops and knit both loops together with the knit stitch behind the back wall.
PATTERNS
Facial surface: Persons rows - front loops, purl. rows - purl loops.
Rubber: Knit alternately k1, p1.

DESCRIPTION OF WORK
BACK
Using knitting needles No. 6, using double beige-gray thread, cast on 87 (93:99:105:113) sts and knit 9 rows for the bottom bar with a pearl pattern: k1, (alternately p1, k1) to the end of the row.
Continue working with the jacquard pattern according to the counting pattern: perform 1 time 5-44 r. jacquard pattern, start with 2 (4:2:4:4th) p. of the counting pattern, then repeat 1-44th p.

Attention: in 27-30 r. Stretch the non-working thread before work, creating a pattern on the front side. Continue knitting according to the pattern until the height of the piece is 84 (86:88:90:92) cm.
SHOULDER SHADES
Cast off 6 (7:7:8:9) sts at the beginning of the next 8 (4:8:4:2) rows, then 5 (6:6:7:8) sts at the beginning of the next 2 (6:2) rows :6:8) p. = 29 (29:31:31:31) p.
Next row: knit 6 sts according to the pattern, cast off 17 (17:19:19:19) sts, knit according to the pattern to the end of the row. Next, perform each side separately, while casting off 2 sts at the beginning of the next 3 purl rows. In the front row, work on the remaining 6 stitches and bind off 2 stitches at the beginning of the next 3 purl rows.
LEFT SHELF
BURLPACK POCKET
On needles No. 6, use a beige-gray thread to cast on 30 stitches and knit 20 cm in stockinette stitch.
In the next front row, decrease 1 x 1 p. on both sides = 28 p. Set the loops aside.
SHELF
Using double beige-gray thread on needles No. 6, cast on 49 (52:55:58:62) sts**
1st r. (= purl row): 4 x (alternately k1, p1), then 41 (44:47:50:54) p. with a pearl pattern, as on the back.
2nd row: 41 (44:47:50:54) sts in a pearl pattern, knit (alternating k1, p1) to the end of the row.
Continue knitting according to the pattern until only 9 r.
Cut the thread and set aside 8 stitches for the fastener bar.
In the front row, use a beige-gray thread.
Next, knit with a jacquard pattern according to the counted pattern as follows: perform the 5th row. jacquard pattern to the end of the row, start with 4 (1:2:3:3rd) stitches of the counting pattern, cast on 1 stitch with beige-gray thread = 42 (45:48:51:55) stitches.
Next row: K1, then knit with a jacquard pattern according to the pattern until the end of the row. Perform the 7-44th row once, then repeat the 1-44th row, while knitting the cast-on loop. When the height of the part is about 44 cm (= after the 18th row of the diagram), enter the pocket.
Knit 3 (4:5:8:10) p. 19th row. jacquard pattern according to the counted pattern, bind off the next 28 sts, transfer 28 sts of the pocket burlap to the right knitting needle with the right side facing you and knit the remaining 11 (13:15:15:17) sts.
Continue working from 20th p.m. jacquard pattern according to the counted pattern until the height of the piece is 49 (50:51:53:54) cm (last row = purl row).
Decrease row (= knit row): knit according to the pattern until the last 3 sts, knit 2 sts together, knit 1. = decreased 1 p.
Repeat the row with a decrease every 2.5 cm 3 more times, then another 9 (9:10:10:10) times every 3 cm = 29 (32:34:37:41) sts.
Continue working without decreasing until the height of the piece is 84 (86:88:90:92) cm (last row = purl row). Bind off 6 (7:7:8:9) sts at beg of next 4 (2:4:2:1) knit rows, then 5 (6:6:7:8) sts at beg of next 1 (3:1) rows :3:4) front row.
RIGHT SHELF
Knit like the left front, up to **.
1st r. (= purl row): 41 (44:47:50:54) sts with pearl pattern, knit (alternately 1 purl, 1 knit) until the end of the row.
2nd row: 4 x (alternating 1 purl, 1 knit), knit with a pearl pattern to the end of the row.
Continue knitting according to the pattern until only 9 r.
Cut the thread and set aside 8 stitches of the fastener strip.
In the front row, include a beige-gray thread in the work, add 1 stitch with a gray-beige thread, then knit with a jacquard pattern according to the counting pattern until the end of the row, and start with 4 (1: 2: 3: 3rd) stitches of the pattern = 42 (45:48:51:55) p.
Next row: knit according to the counted pattern until the last loop, k1.
Perform rows 7-44 once, then repeat rows 1-44, while knitting the cast-on loop in garter stitch. When the height of the part is about 44 cm (= after the 18th row of the counting diagram), enter the pocket.
Knit 11 (13:15:15:17) p. 19th row. jacquard pattern according to the counted pattern, bind off the next 28 sts, transfer 28 sts of the pocket burlap to the right knitting needle with the right side facing you and knit the remaining 3 (4: 5: 8: 10) sts.
Continue working from 20th p.m. jacquard pattern according to the counted pattern until the height of the piece is 49 (50:51:53:54) cm (last row = purl row).
Decrease row (= knit row): K1, decrease 1 p. with a shift, knit according to the pattern until the end of the row = decrease 1 p. Repeat the row with decreases every 2.5 cm 3 more times, then 9 (9:10:10:10) times every 3 cm = 29 (32:34:37:41) sts. Continue working without decreasing until the height of the piece is 84 (86:88:90: 92) cm (last row = knit row).
Cast off 6 (7:7:8:9) sts at beg of next 4 (2:4:2:1) purl rows, then 5 (6:6:7:8) sts at beg of next 1 (3:1) :3:4) purl row.
SLEEVES
On knitting needles No. 7, using double beige-gray thread, cast on 53 (55:59:59: 61) sts for each sleeve and knit 20 cm with an elastic band.
Switch to knitting needles No. 6. Continue working with the jacquard pattern according to the counting pattern: perform 1 time 5-44 r. jacquard pattern, start with 4 (2:2:2:4th) p. of the pattern, then repeat 1-44th r. When the length of the piece reaches 39 (39:39: 40:40) cm, close the loops.
ASSEMBLY
Sew the burlap pockets to the shelves from the wrong side. Sew shoulder seams.
BUTTOON PLAN
In the front row, transfer the set aside 8 stitches of the left shelf onto needles No. 6. Cast on 1 p. and knit with an elastic band until the end of the row = 9 p.
Continue working with the elastic until the height of the piece reaches the middle of the back neckline, slightly stretched. Close the loops and sew the fastener bar to the left shelf using a mattress stitch. Using stitch markers or contrasting thread, mark the locations of three buttons on the fastener bar: the topmost button is at the beginning of the neckline, the other two buttons are below it, at a distance of 14 cm from each other.
BUTTON HOLE PLAN
Starting with a purl row, knit like the fastener bar on the left front, but with holes for buttons. Row with holes for buttons (= knit row): 3 sts with rib, knit 2 sts together, 1 yarn over, knit with rib to the end of the row. Sew the fastener strip to the right front and connect the two fastener strips on the back into a single strip along the short edges.
ASSEMBLY
Fold the sleeves in half and sew them in, aligning the top edge with the shoulder seam. Sew sleeve seams and side seams. Sew buttons.
