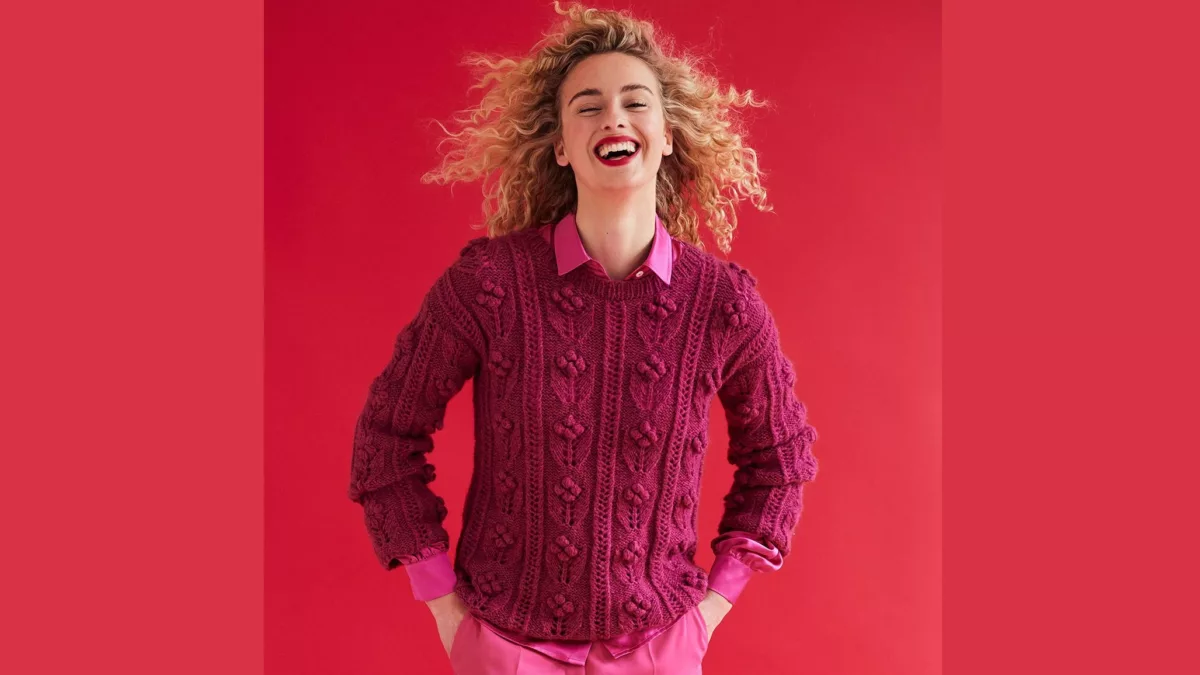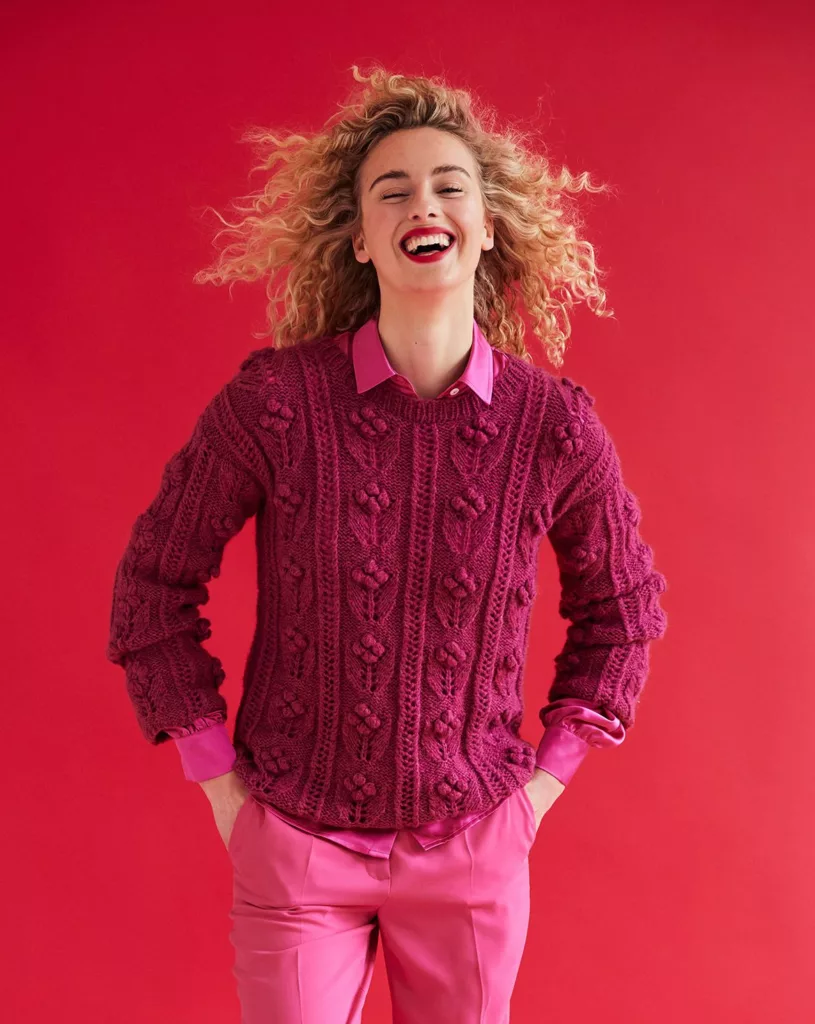
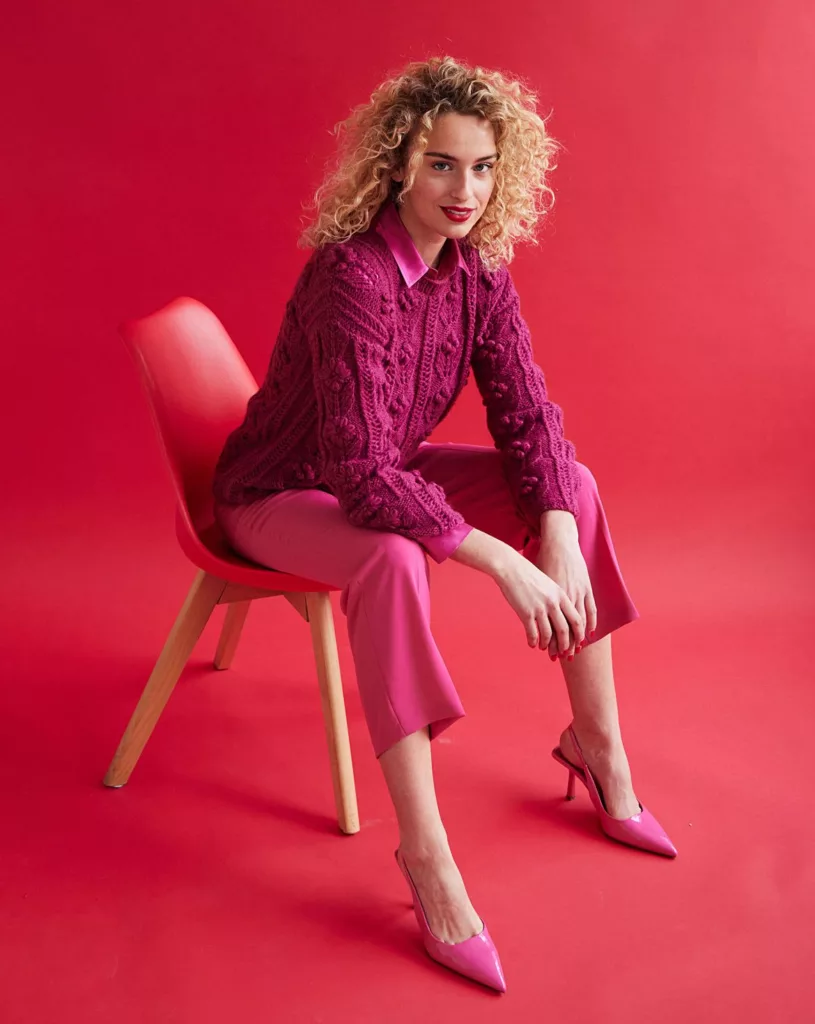
An interesting work for experienced knitters: a fashionable fuchsia pullover with a combination of “bumps”, through patterns and floral embroidery that make the model truly luxurious!
European sizes: 36/38 (40/42) 44/46
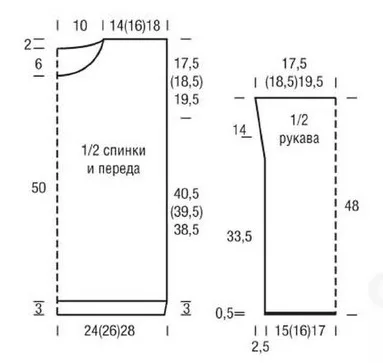
Product width according to chest circumference: 96 (104) 112 cm.
Product length: 61 cm.
Sleeve length along the inner seam: 48 cm.
You will need: 8 (9) 10 skeins of fuchsia yarn (47% baby alpaca wool, 45% cotton, 8% merino wool; 50 g/140 m); knitting needles No. 4 and 4.5; circular knitting needles No. 4, 40 cm long; tapestry needle.
Knitting technique.
Rubber: knit alternately knit, 1 purl.
Edge stitches: slip the 1st stitch of each row as a knit stitch, knit the last loop of each row as a knit stitch.
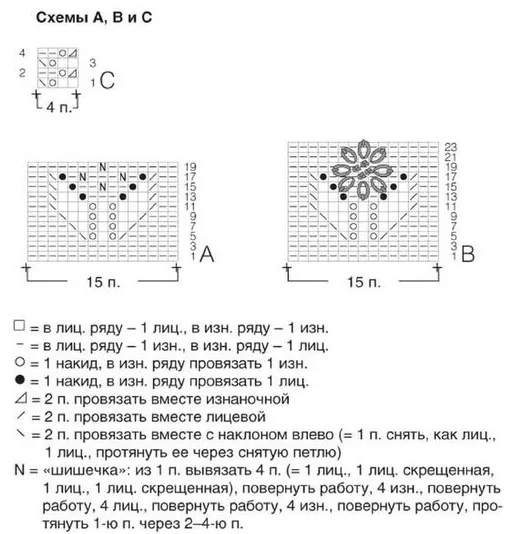
Pattern of "cones" (for 15 loops): knit according to pattern A. The numbers on the right refer to the front rows. In purl rows, knit according to the pattern (or as described in the legend). Knit rows 1–20 once, then repeat row 20.
Floral pattern (for 15 loops): knit according to pattern B. The numbers on the right refer to the front rows. In purl rows, knit according to the pattern (or as described in the legend). In the 15th–19th rows under the embroidered flower in the front rows, knit only purl loops, in the purl rows - only front ones. Knit rows 1–20 once, then repeat row 20.
Note: 21–24th rows = beginning of the 2nd repeat in height.
Openwork pattern (for 4 loops): knit according to pattern C. The numbers on the right refer to the front rows, on the left - to the purl rows. Knit rows 1–4 once, then repeat rows 3 and 4. For clarity, the diagram shows 2 repeats in height.
Purl stitch: front rows - purl loops, purl rows - front loops.
Flower embroidery: embroider according to patterns (see also pattern B) using chain stitch and French knot.

Chain stitch (see diagrams 1–3): make the first small stitch. Bring the needle through the fabric to the desired stitch length to the right of the first stitch, pass the needle under the first stitch between the thread and the fabric, insert the needle into the same point from which you just brought it out. Bring the needle through the fabric at a distance of 3 mm from the previous stitch, pass the needle under the previous stitch, insert the needle into the same point from which you just brought it out.
French knot: bring the needle to the front side of the work. Wrap the thread quite tightly around the needle several times and then reinsert the needle onto the wrong side, holding the needle and threads at the insertion site to create a knot.
Knitting density, pattern of “bumps” with knitting needles No. 4.5: 18 loops and 23 rows = 10 x 10 cm.
DESCRIPTION OF WORK
Back: on knitting needles No. 4, cast on 83 (91) 99 sts and knit with an elastic band of 3 cm = 9 rows, starting from the purl row, after the edge at the beginning of the row and before the edge at the end of the row, knit 1 purl. In the last row of elastic, evenly add 5 stitches, knitting them with a crossed loop from the broach = 88 (96) 104 stitches.
Switch to knitting needles No. 4.5 and continue knitting as follows: edge stitch, 3 (7) 11 stitches in purl stitch, * 4 stitches in openwork pattern, 15 stitches in “bump” pattern *, repeat 3 times from * to *, 4 p. openwork pattern, 3 (7) 11 p. purl stitch, edge stitch. After 40.5 (39.5) 38.5 cm from the end of the elastic, mark the beginning of the armholes on both sides.
After 17.5 (18.5) 19.5 cm from the beginning of the armholes for the neckline, close the middle 26 stitches and finish both sides separately. To round the neckline in every 2nd row, bind off another 1 x 3 sts and 1 x 2 sts. After 2 cm = 6 rows from the beginning of the neckline, bind off the remaining 26 (30) 34 sts of the shoulder. Finish the second side in a mirror manner.
Before: knit like a back, but with a deeper neckline. To do this, after 9.5 (10.5) 11.5 cm = 22 (24) 26 rows from the beginning of the armholes, close the middle 16 stitches and finish both sides separately. To round the neckline in every 2nd row, cast off 1 x 3 p., 2 x 2 p. and 3 x 1 p.
Close the remaining 26 (30) 34 stitches of the shoulder at the same height from the beginning of the armholes as on the back. Finish the second side in a mirror manner.
Sleeves: On knitting needles No. 4, cast on 55 (59) 63 stitches for each sleeve and knit with an elastic band of 0.5 cm = 2 rows, while in the 1st row, after the edge at the beginning of the row and before the edge at the end of the row, knit 1 knit.
Switch to knitting needles No. 4.5 and knit as follows: edge stitch, 0 (2) 4 sts in purl stitch, 15 sts in a “bump” pattern, 4 sts in an openwork pattern, 15 sts in a floral pattern. 4 p. openwork pattern, 15 p. pattern of “bumps”, 0 (2) 4 p. purl stitch, edge stitch.
After 33.5 cm = 78 rows from the end of the elastic band for bevels, add 1 stitch on both sides with purl stitch, then in every 8th row 1 x 1 stitch and in every 6th row another 3 x 1 stitch = 65 (69) 73 p.
After 14 cm = 32 rows from the 1st increase, loosely bind off all the loops.
Assembly: on the middle stripes of the pattern, embroider flowers using the methods described above - chain stitch and French knot.
Sew shoulder seams.
Using circular needles No. 4, cast on 84 sts along the edge of the neckline and knit with an elastic band in circular rows. After 2.5 cm, close the loops, knitting them according to the pattern.
Sew in the sleeves, taking into account the markings on the diagram. Sew side seams and sleeve seams. Thread all the threads.
Related posts
About the Author
Welcome !
My name is Lilia. The main hobby of my life is knitting. I started with knitting needles and switched to a knitting machine. In 1988 I got acquainted with crochet - Romanian lace. About 10 years ago I became interested in Irish lace and Shetland knitting. And now I’m trying fillet crochet. On this site I want to share with you my 45 years of experience in various knitting techniques.
Latest publications
Flowers on fillet lace. Part 2.
Flowers on fillet lace. Part 1
Blog Subscription
Be the first to receive new items!

