
Size: 44 – 46
You will need: 1000g birch yarn Lana Gold Fine, hook N 4.
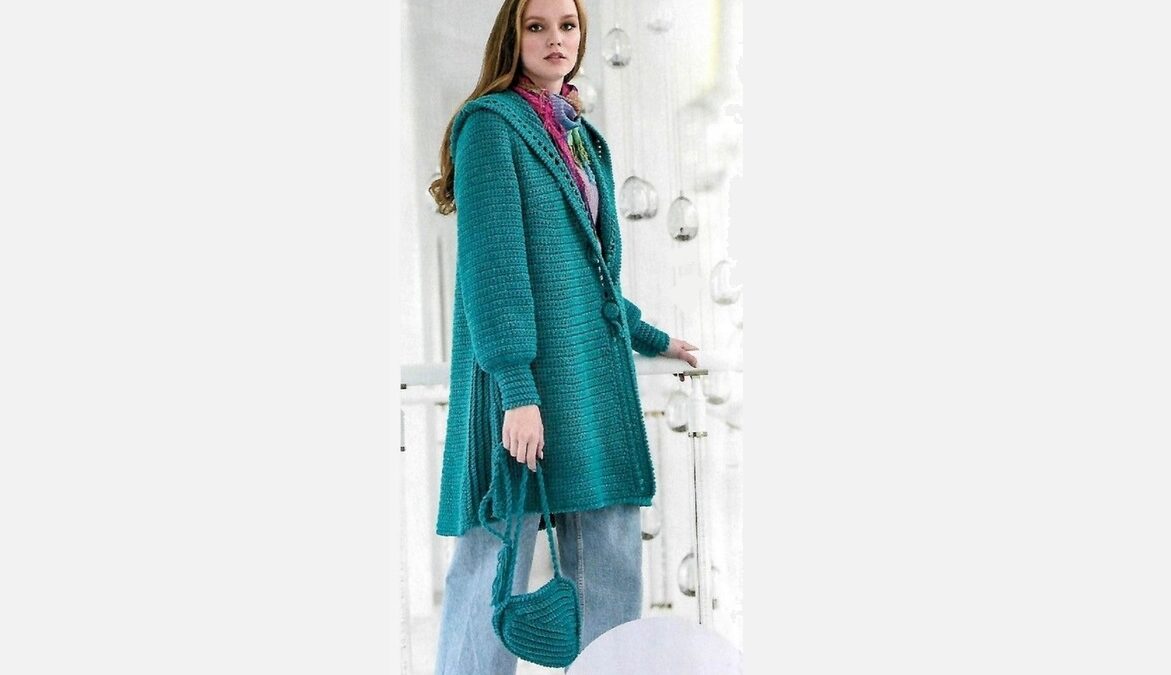
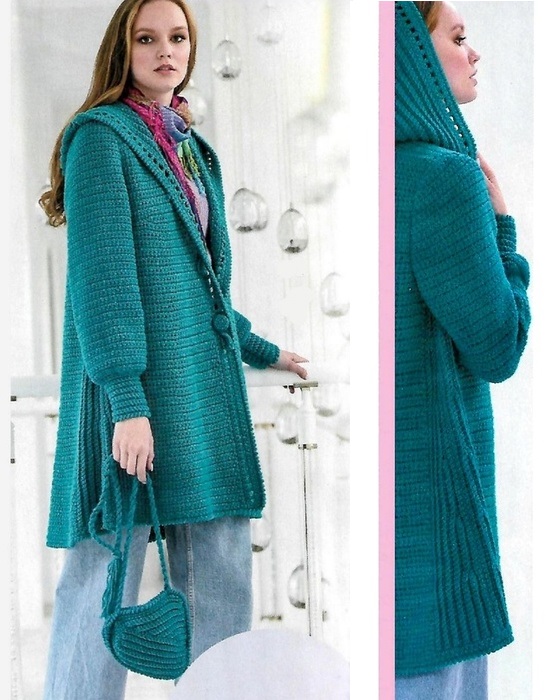
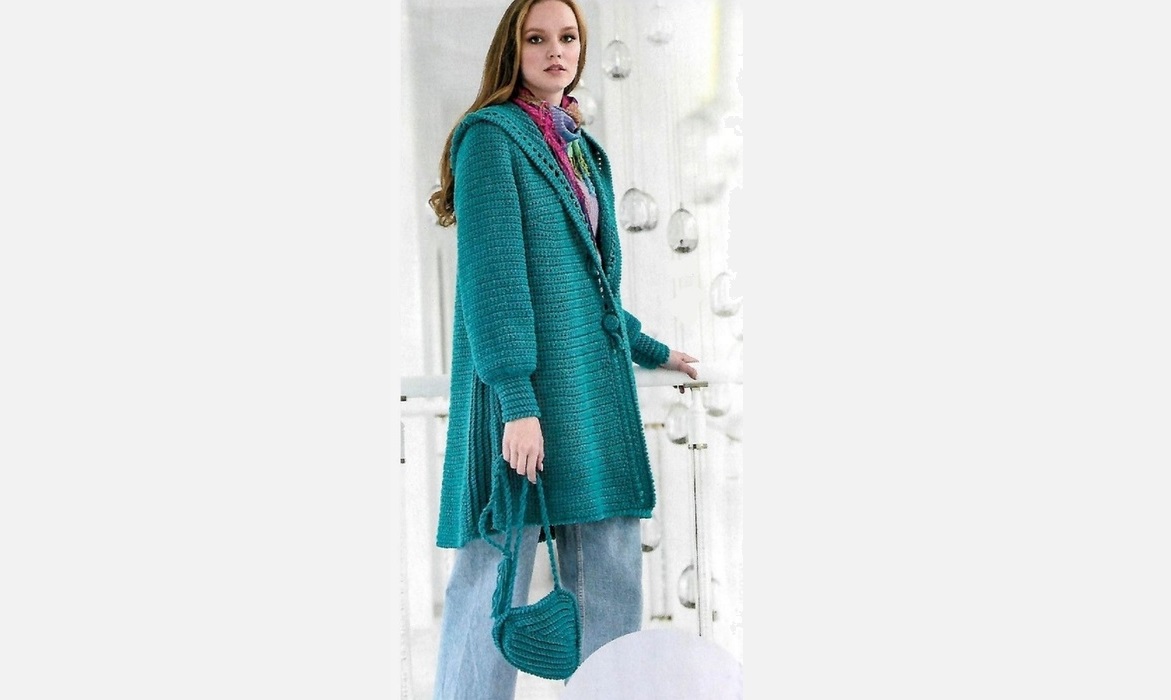
How I wish, when going outside, when it’s chilly and damp, to have a small blanket with me. But this is not very convenient. And this is where a stylish knitted cardigan can help correct the situation. It will be the best addition to almost any style. Among all the variety, you will find your favorite “favorite color and favorite size.”
For the work, the author chose the easiest to perform, but also the most popular method of tying loops - single crochet. There are only three ways to do it, but there are many possibilities for obtaining different textures of the canvas.
Fabrics knitted with single crochets retain their shape perfectly, which plays a major role when choosing the method of making outerwear items.
In Fig. Figure 1 shows what are called half-loops and what they look like.
In Fig. Figure 2 shows the technique of knitting the loops of the working row in the back half-loop, and in Fig. 3 – technique of tying loops in the front half-loop.
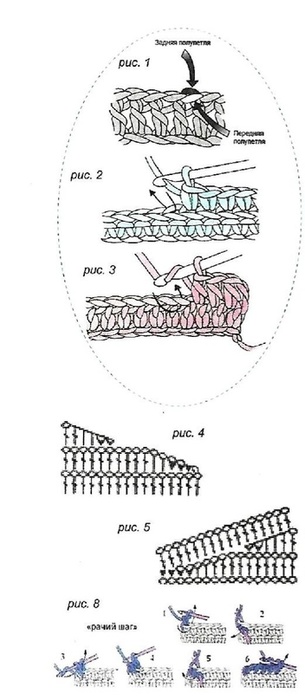
There is another way to knit single crochets - using both half-loops.
In the first case, the result is a canvas with “ribs”, in the second – even.
The thickness of the yarn and the size of the hook, respectively, allow you to create quite textured products.
Sometimes, during work, it is necessary to increase or decrease the size of the canvas, or perhaps create some volume in any part of the canvas.
There are several ways to increase the size of the canvas and create different contours. For this, a partial knitting technique is used. The essence of this technique is that the working rows are not completed completely. That is, each subsequent row is reduced or increased by a certain number of loops.
Let's look at this issue in more detail.
In Fig. Figure 4 shows a diagram of a smooth reduction in the number of loops at the end of the row. To prevent the edge of the fabric from being torn (in steps), it is advisable to knit the end loops with posts or loops of different heights. If the fabric is made with double crochets, then at the end of the row you need to knit several half-columns, single crochets, and finish the row with a connecting loop (connecting stitch).
If the fabric is made with single crochets, then knit the end loops two together and finish the work by making a connecting stitch.
In the case where additional rows are knitted in the middle of the fabric (various darts, wedges), it is necessary to perform a leveling row. which is knitted on all loops of the row.
This technique is shown in Fig. 5 and 6.
After we remembered, or perhaps learned for the first time, about such an interesting and very useful technique, we will begin to carry out our plans.
Work on preparing a control sample should be a mandatory step in the implementation of the proposed model.
The final result depends on the correct calculation of the knitting density and determining the number of loops involved in creating decorative wedges.
When making rows of shelves, additional rows are knitted to form horizontal darts.
This technique contributes to a better fit of the finished product.
The model is performed from top to bottom.
Before starting work, prepare a pattern (Fig. 7) and make a control sample. This will not be superfluous, at least in order to correct the author's values.
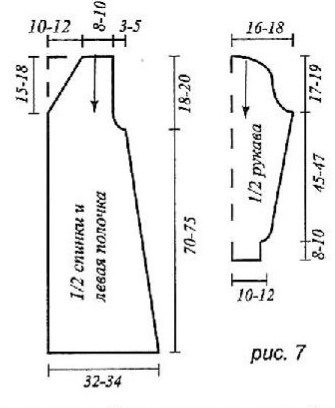
For the back, dial a chain of 35 air. n. Continue working with single crochets, remembering to perform a lifting loop at the beginning of each row.
Knit the loops in accordance with Fig. 3.
Having completed 26-28 rows from the beginning of knitting to form armholes, add 1, 2 and 5 loops at the end of each row on both sides.
Next, continue working with single crochets, gradually increasing the fabric by 1 loop on both sides.
Add loops every 8-10 rows.
Having completed 70-72 rows from the armholes, set aside the work.
LEFT SHELF
For the left shelf, cast on a chain of 19 chain stitches.
Continue working in single crochet stitches, remembering to perform a crochet stitch at the beginning of each row.
Knit the loops in accordance with Fig. 3.
For the neckline, add 1 stitch at the end of every second row. Repeat the technique of adding loops 10-12 times.
Having completed 26-28 rows from the beginning of knitting to form armholes, add 1, 2 and 5 loops at the end of the row on one side. Having completed 4-5 rows on all loops, to form a dart, knit 4-6 shortened rows, reducing each subsequent row by the required number of loops (5 loops, original value). Continue working on all loops with single crochets, gradually increasing the fabric by 1 loop from the side bevel.
Add loops every 8-10 rows. Having completed 70-72 rows from the armhole (the dart rows are not included in the count), set aside the work.
Knit the right front symmetrically with the left.
SLEEVE
For the sleeve, cast on a chain of 8-10 chain stitches. and continue working with single crochets, knitting them in accordance with Fig. 3.
To form the sleeve cap, add 1, 2 and 5 loops at the end of each row 2, 8-10 times.
To bevel the sleeves, decrease 1 loop on both sides in every 6-8 row, knitting two loops together at the end of the row.
After completing 46-48 rows, for the cuff, reduce the number of loops by 1/3.
Knit the loops in accordance with Fig. 2. To make a decorative wedge along the side bevel of the right/left shelf, make 2 rows of 65-67 single crochets.
Then knit rows using the partial knitting technique and decreasing every other row by 10 stitches.
Knit the loops in accordance with Fig. 2 (for the back half loop). Repeat the procedure 5 times.
Make decorative wedges along the side bevels of the back.
Sew side and shoulder seams.
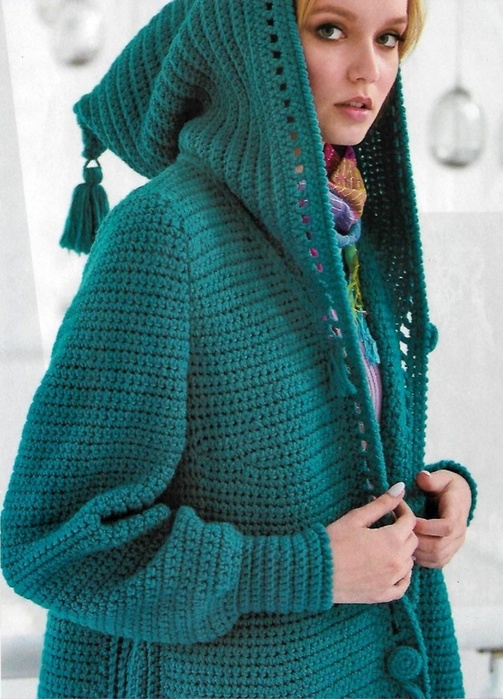
HOOD
For the hood, cast on the required number of loops.
Continue working with single crochets, knitting them as shown in Fig. 2. Reduce the number of loops in the row by 2-4 loops on both sides of the fabric.
After completing 38-40 rows, set aside the work.
ASSEMBLY
Sew the back seam of the hood and sew it along the neckline. Sew the seams of the sleeves and sew them in.
Along the edges of the shelves and the edge of the hood, make a row of fillet mesh, a row of single crochets and finish the work with a row of “crawfish step” fig. 8.
Prepare buttons and a tassel for the hood.
Secure them in the appropriate places.
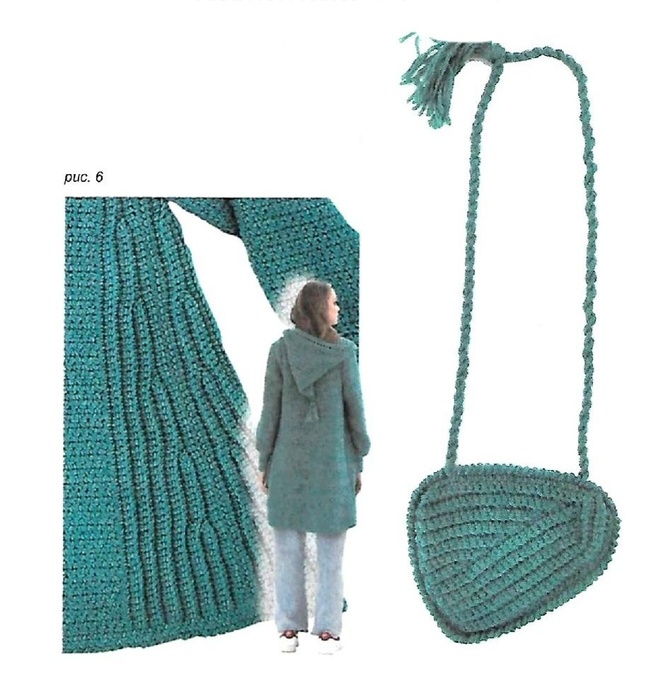
HANDBAG
Size: optional
You will need: turquoise yarn Lana Gold Fine; hook no. 4
Knitted bags have recently become a very popular brand for fashionistas of any age.
Whether bags are intended to perform a direct function or are decorative, they all have their advantages and disadvantages.
The handbag presented by the author has more decorative functions than practical ones.
To perform it, you need the same techniques for knitting single crochets presented in the cardigan.
Using the partial knitting technique will allow you to create an accessory of the desired size and shape.
Make two identical parts.
For the bottom, prepare a tape equal to the length of three sides of the side part.
Connect the prepared parts together.
Tie the edges of the bag in a “crawfish step”.
For fastening, you can use a zipper or a clasp.
For the handle, prepare pieces of yarn that you twist together.
Secure the resulting tourniquet in the corners of the bag.
Tie the ends of the strands and make a tassel.

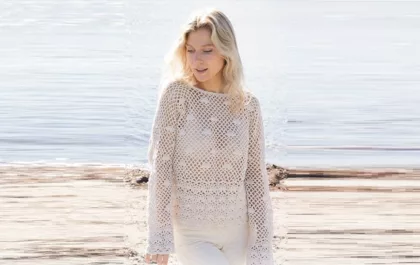
Openwork pullover with “bumps”
Ажурный пуловер с «шишечками», связанный снизу вверх из пряжи DROPS Belle
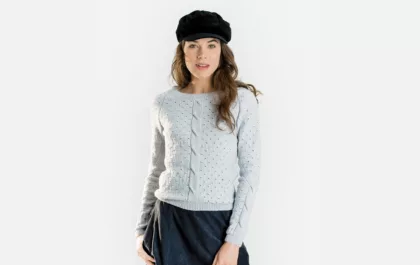
Классический джемпер с косами и вырезом на спине
Когда вязание проникается духом Высокой моды, рождается такой пуловер из тонкой мериносовой шерсти. Жемчужно-серый цвет создает прекрасный фон для милого ажурного узора и исключительных деталей: рукава, перед и спинка украшены «косами», глубокий каплевидный вырез сзади соединен шифоновой лентой в тон пряжи.