
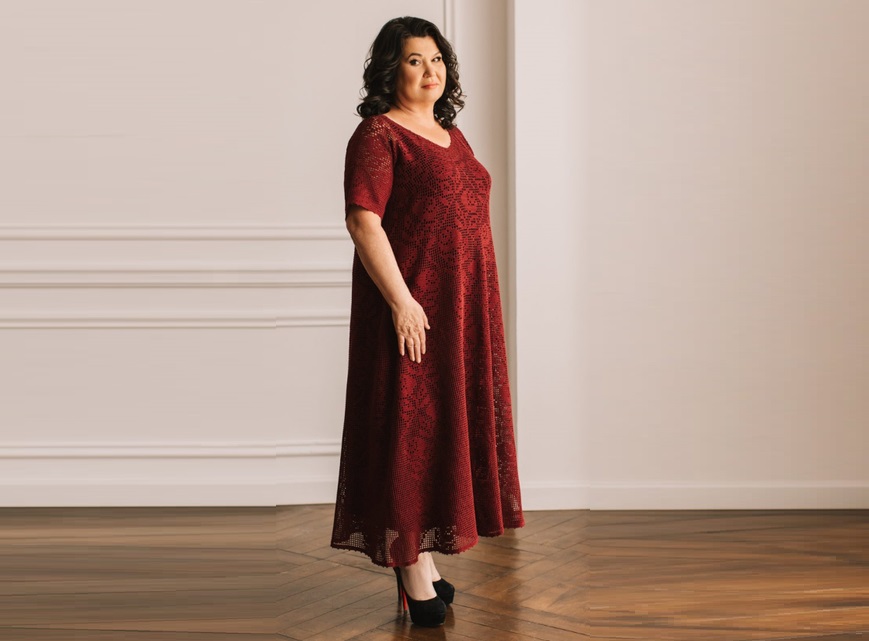

Floor-length dress “Roses”.
A chic floor-length dress with a scattering of magnificent roses will become a real pearl of every woman’s wardrobe. An exclusive that you can’t buy in a store...
Model Valentina Dyachenko
Size: XXXXL (Russian 60)

You will need: yarn “Anna 16” (100% mercerized cotton, 530 m/100 g) 900 g burgundy color, hook No. 1
This model is connected with darts, for convenience, first knit the top of the front and back parts separately, sew the sides and shoulders
Then continue knitting in circular rows down to the desired length of the dress.
Before starting work, knit a sample and calculate the number of cells for your size.

While knitting, pay attention to the number of cells that form the “Roses” pattern in the diagram.
Before:
dial 258 air. p. + 3 air. lifting point [85 cells, 60 cm)
Knit the fillet pattern according to the pattern, starting from the 1st row.

Knit 12 rads before starting to knit the dart.
On the resulting strip, mark 27 squares on both sides of the edge with a marker; this is the length of the dart.
Knit the darts simultaneously on both sides in short rows.
1st row - skip 2 fillet cells with transition loops (connecting stitches), decrease the 3rd, then knit strictly according to the pattern, without knitting 3 cells to the end of the row, decrease the outermost cell, turn the work, skip 2 cells with transition loops, 3 th cell, etc.
Knit in short rows for a total of 9 rows of dart. Thread the thread
Tie a thread to the beginning of the row and knit 10 rows strictly according to the pattern until the armhole. The height from the dart to the armhole is 7 cm (+10 squares).
Knit the sleeve armholes and neckline simultaneously and separately. Downloaded, complete the markup
Determine the middle of the canvas, this will be the beginning of the neck, attach a marker to the center, There are 13 cells for each shoulder.
1st row of the armhole, skip 8 fillet cells with transition loops, decrease the 9th cell, then knit 1 cell without reaching the middle of the front, decrease it, turn the work and decrease 1 cell again.
Continue knitting until the last cell of the armhole and decrease it.
Turn the work and again 1 square. So knit 5 rows in rotary rows, decreasing 1 square in each row: 8 + 5 = 13 squares.
At the same time, decrease 1 square along the edge of the neck until 13 squares remain on each shoulder.
Distance from dart – 25 cm
Back:
dial 258 air. p. + 3 air. p. rise (-86 fillet cells).
Knit the fillet pattern according to the pattern, starting from the 1st row. The distance from the dart to the shoulder is 22 rows.

Attach the fabric to the knitted part of the front, the sides should match. Form the armhole on both sides at once. Skip 5 cells from the edge with transition loops and decrease 1 3 times in each row.
In total, subtract 8 squares on both sides.
Next, knit 30 rows until the back neckline is formed. Divide the loops in half and knit each side separately. Leave 15 cells per shoulder on both sides. Starting from the 17th cell, decrease from the inside of the edge 4 times, 1 cell in each row. In total, knit 34 rows from the armhole.
The total number of rows of the bodice on the front and back is 56.
Sew shoulder and side seams.
Try on the part.

Next, knit the bottom of the dress.
Turn the pattern over, attach the thread to the side and knit in circular rows downwards without disturbing the overall picture of the pattern
To ensure that the joint of the circular rad does not “mow”, knit with deep seaming under the third thread of the double crochet.
You can also knit a rad in the opposite direction every 5 circular rads, this will also help avoid skewing the fabric.
Since the dress pattern repeats, you can easily increase the number of cells without disturbing it
Find the end of the branches [filled cell] and in the next row, tie 2 empty cells under the cell instead of one
Add 6-8 cells in one row
For smooth expansion of the increase after 5-8 rows
Sleeves:
tie to the bottom of the armhole and knit according to the pattern in circular rows.
If the armhole turns out to be a little larger, it can be reduced by knitting not 2, but 1 air stitch in each row. p. Knit subsequent rows as before.
Sleeve, hem and neck edges tie as follows: 2 rows - st, b/n and 1 row - “6 tbsp. b/n, “pico” from 3 air p.”, repeat until the end of the row.

Detailed tutorial by Valentina Dyachenko on knitting a dress “ROSE”
Yarn Anna 16 (100g-530m), consumption 900g, hook 1.0 Clover. Size 60.
Floor length dress. This is the drawing I chose.
Scheme of the “Roses” pattern

And all the same actions: glue several fragments of the diagram, following the drawing.
After gluing, draw a pattern (here*** detailed tutorial by Valentina Dyachenko on creating a pattern for knitting a loin dress).
I immediately drew a shelf with a dart and an armhole. I did not make a bevel on the shoulder. So 86 cells turned out to be 60 cm.
The principle of all calculations is shown in detail in dress “Forget-me-not”, you can see here***

I'll show you how to calculate the number of cells for your size. To do this, knit a SAMPLE of 20 fillet cells. Set of VP 20Х3=60+3VP lifting. Knit 10 rows. Wash, dry and steam the knitted sample. Count in the middle how many centimeters are in 20 cells. So in my 20th grade I have -12cm. X class – 60cm (1/2 of my chest volume) Solution: (20X60): 12=100 cells. Answer: for size 60 there are 100 fillet cells. But you may have a different number of cells, I showed how to make the proportion. You need to substitute your values. You have a different hook, threads, and the knitting technique itself. Now I’ll show you how to calculate how much VP to type for row 1. Let's say you need to collect 68 cells. CALCULATION 68Х3=204+3VP lift.
I knit the same with one crochet 1.0 Clover, Anna threads 16, each time the number of cells for my size 60 is different. So the drawing also matters.


Dark cherry color No. 313.
Start of knitting. According to the pattern, we knit 12 rows until the dart. Then the tuck itself. 9 rows high and 28 rows wide. I immediately made marks from the edge of 28 cells, the middle turned out to be 30 cells. I knitted the tuck according to the pattern.

Short rows. Thus all 28 cells


This is what the groove looks like. Then I tied it with connecting posts to make it easier to knit later. 10th row strictly according to the drawing.

Photo of what the dart itself looks like and 10 rows strictly according to our drawing.

Now I will knit the front armhole and immediately the neckline. I decided V-shaped. The armhole is 8 cells, we do not knit the transition with connecting loops, then I will decrease 5 rows by 1 cell. And immediately from the middle of the shelf, subtract 1 cell per V-shaped neckline
This diagram is simpler and clearer.

You can knit a dart this way. There is no picture here, but we need one with a picture.

I'll show you how to knit an armhole. We skip the first 8 squares, reduce the 9th square and knit it to the middle and also decrease the square on our neckline (toe). 1st and 2nd row.


So we knit the armhole and neckline at once. First one side, then the other half to the shoulder. The shoulder was reduced to 13 squares and from the beginning of the armhole and neckline to the shoulder there were 25 rows. This is due to the armhole. There will be a big neck, don’t be afraid, we’ll tie it and everything will fall into place.
Now I'm starting to knit the back. I’ll type 86 squares and at the same time a pattern, knit 23 rows and start knitting the back armhole, I won’t knit 5 squares and 3 rows will decrease by 1 square, Total 8 squares. I knit 25-4 = 21 rows according to the pattern, then I will start knitting the back neckline. I will note the shoulder 13 cl+4. And I will decrease 3 rows to the floor of 1 cell and the last row straight.


Let me remind you, we measure everything. My width is 60cm. Height from dart to armhole 7cm. – 10 rows. From shoulder to chest 25cm. Let me remind you that these measurements are mine. Yours will definitely not coincide with mine. Measure yourself directly and try to transfer these measurements to the knitted shelf, then the dart will be in place.
I remind you to take measurements only after steaming.
We count the rows from the beginning of the fabric to the armhole.
So as not to get confused in the rows and cells. We knit according to the pattern up to the armhole. To avoid mistakes, attach the back to the finished shelf.
Row 1 is the beginning of the back armhole - 5 squares, proceed without knitting RLS or connecting loops for whomever is convenient and immediately reduce 1 square, so another 2 rows. Total 5 at once and 3 cells in each row.
We form an armhole on both sides at once.


We knit the back neckline and sew the shoulders and sides. Be sure to try it on yourself, if you knit it for someone, carefully measure it with a centimeter so that all the measurements match. Now I will knit the bottom of the dress.


To make it easier to knit, and most importantly to combine the pattern. I suggest gluing 4 more leaves. Turn over and continue knitting the bottom of the dress. Like that. Here is my full size pattern.


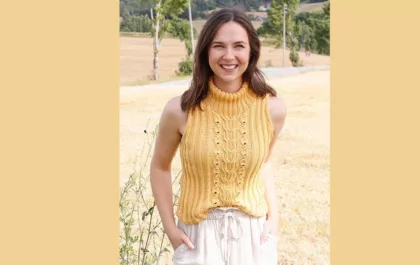
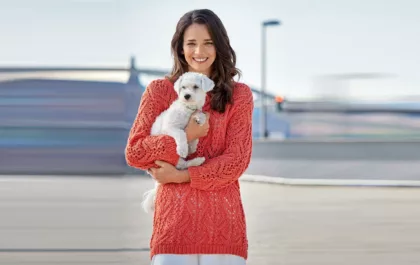
Ажурный удлиненный пуловер
Ажурный удлиненный пуловер связанный из 100% биохлопка не оставит равнодушным никого. Сияющий коралловый цвет пленит кого угодно!