
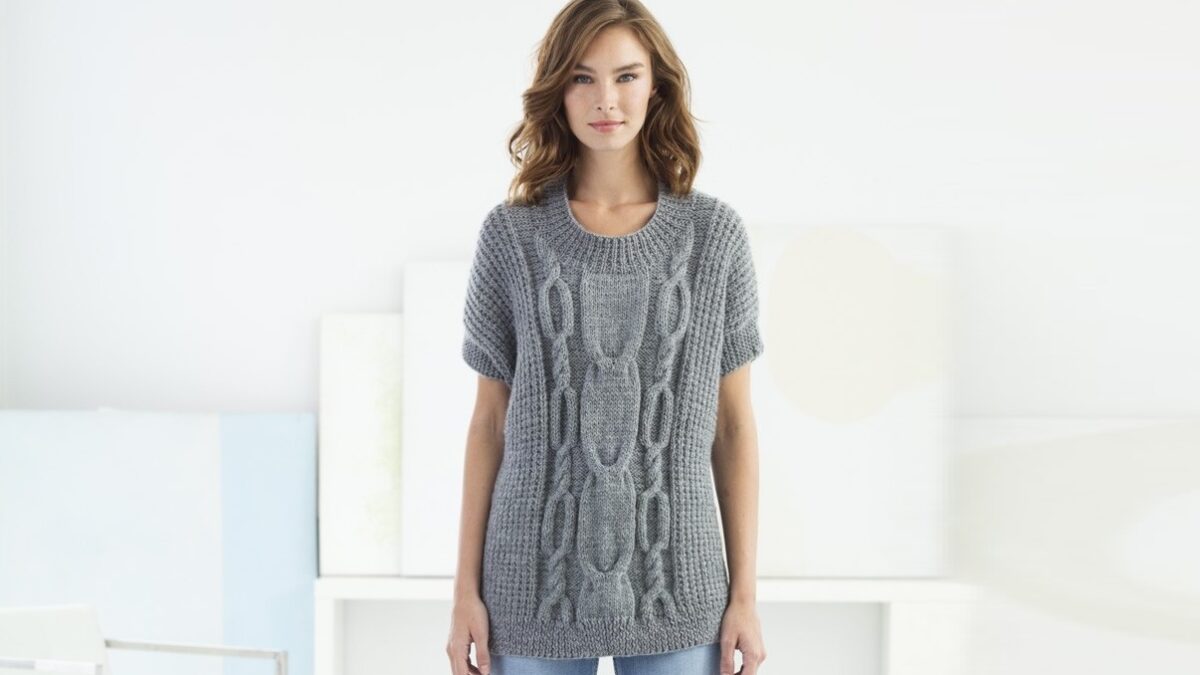
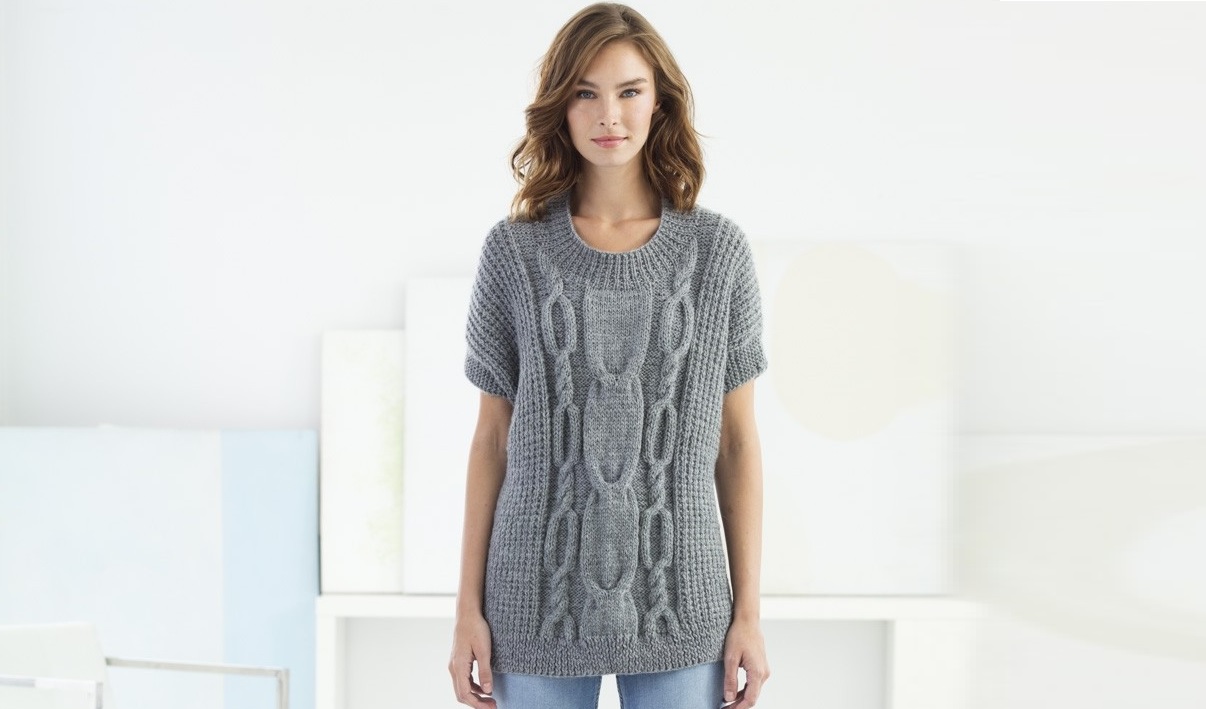
This stylish short-sleeved jumper is decorated with voluminous braids down the center front and back. An original detail is the interesting design of the lower back, which is slightly longer than the front. The sleeves are knitted together with the body from cast-on stitches, so the elastic pattern on the sleeves is not interrupted.

Sometimes you really want something unusual, but at the same time, for this item to fit into any wardrobe.
This pullover with large braids is what you need. Its simple cut and interesting pattern will add zest to your look.
The pullover is knitted in separate pieces. It does not require sleeves, since they are formed by increases while knitting the front and back.
The pattern with braids resembling chains is knitted quite quickly due to thick knitting needles and bulky thread containing alpaca.
The neck and sleeve strips are knitted after the pullover is completed.
The loose fit of the pullover will allow even curvy girls to wear it, and the length below the hip is sufficient to wear it with skinny jeans or trousers, thereby creating a relaxed casual style.
Design by Irina Poludnenko

Dimensions: S/M (L/XL, 2XL /3 XL)
Finished Product Measurements
Chest circumference 122 (142, 162.5) cm, length (71 (73.5, 76) cm
Description given for smaller size. Differences for other sizes are given in parentheses. When one size is specified, it applies to all braids. For convenience, before knitting, circle the numbers related to your size.


You will need: Touch of Alpaca™ Bonus Bundle® yarn (90% acrylic, 10% alpaca) 380 m / 200 g - 5 skeins (Oxford Gray color shown in the photo); circular knitting needles 5 mm long 40 cm and 90 cm; markers, extra knitting needle, tapestry needle

Knitting density
17 sts and 22 rows = 10 x 10 cm broken rib
16 stitches = 9 cm in braid pattern 1.
20 stitches = 10 cm in braid pattern 2
Check your knitting density
Patterns used
Rubber: K1, P1 (work on even number of stitches)
Row 1 (RS): *k1, p1; repeat from * to the end of the row.
Row 2: Knit knit, purl knit as the stitches look.
Repeat Row 2.
broken rubber band (knitted on an even number of loops)
Row 1 (RS): Knit.
Row 2: *k1, p1; repeat from * to the end of the row.
Repeat Rows 1 and 2.
Braid 1 (knitted 16 stitches)
Row 1 (RS): P2, k3, p6, k3, p2.
Row 2: k2, p3, k6, p3, k2.
Rows 3-6: Repeat Rows 1 and 2 twice.
Row 7: P2, slip 3 stitches on extra needle before working, P3, k3 on extra needle, 3/3 slip 3 stitches on extra needle while working, k3, P3 on extra needle, P2.
Row 8: K5, P6, K5.
Row 9: P5, slip 3 sts on extra needle before work, k3, k3 off extra needle, p5.
Row 10: K5, P6, K5.
Row 11: P5, k6, p5.
Rows 12 and 13: Repeat rows 10 and 11.
Row 14: Repeat row 10.
Rows 15-20: Repeat rows 9-14.
Rows 21 and 22: Repeat rows 9 and 10.
Row 23: P2, slip 3 stitches on extra needle while working, k3, p3 on extra needle, slip 3 stitches on extra needle before working, P3, k3 on extra needle, P2.
Row 24: Repeat row 2.
Rows 25-30: Repeat rows 1-6.
Repeat rows 1-30.

Braid 2 (knitted in 20 stitches)
Row 1 (s): P2, k16, p2.
Row 2: K2, p16, k2.
Rows 3-14: Repeat rows 1 and 2 6 times.
Row 15: P2, slip 4 stitches on extra needle while working, k4, k4 on extra needle, slip 4 stitches on extra needle before working, k4, k4 on extra needle, p2.
Row 16: Repeat row 2.
Rows 17-30: Repeat Rows 1 and 2 7 times.
Repeat Rows 1-30 for braid pattern 2.


Note: The pullover consists of two parts - front and back. They are knitted separately from bottom to top. Loops are placed on each side of the armpits for knitting sleeves.
Edge loops are made along the edge. Long circular needles are used due to the large number of stitches, knit on them in turning rows.
Knit a braid pattern according to a graphic or verbal pattern. On the graphic diagram of faces, the rows are shown from right to left, purl from left to right.
When the description says “as installed”, knit the next row according to the pattern of the previous one. When the description says “knit straight”, knit further without decreasing or adding stitches.
Cast on 110 (126, 144) sts on long circular needles.
Rib knit k1, purl 1 7.5 cm. Work the purl row last.
Installation row (LS): K1 (edge), place a marker, then knit Row 1 of all patterns: first knit a broken rib on the next 28 (36, 45) sts, place a marker, then knit Braid I on the next 16 sts, place a marker, knit Braid II on the next 20 stitches, place a marker, work Braid I on the next 16 stitches, place a marker, work a broken rib on the next 28 (36, 45) stitches, place a marker, k1 (edge).
Work straight in patterns as set, working the first and last stitches in garter stitch (knit in each row) as edge stitches and re-taking markers as you knit. At a height of 40.5 cm) from the beginning, finish knitting by completing the last row on the IP.
Sleeve Formation
Row 1 (RS) – Row with adding stitches: knit to the first marker, knit 1 knit stitch from the broach, re-slip the marker, knit in patterns as set to the last marker, re-slip the marker, knit 1 knit st from the broach, knit to the end of the row – 112 (128, 146) pets.
Row 2: Work in garter stitch to the first marker, slip in the marker, work in patterns to the last marker, slip in the marker, work in garter stitch to the end of the row.
Rows 3-16: Rep Rows 1 and 2 7 more times – 126 (142, 160) stitches when all incs have been completed.
Place a marker on each edge in row 16.
Knit straight patterns as specified 18 (20.5, 23) cm) from the sleeve markers. Finish by knitting the last row on the WS.
Shaping the shoulder line
Rows 1-8: Cast off 8 (9, 10) sts, work in patterns as set to end of row - 62 (70, 80) sts remaining.
Rows 9 and 10: Cast off 11 (14, 17) sts and work in patterns as set to end of row.
Cast off remaining 40 (42, 46) sts.
Using long circular needles, cast on 110 (126, 144) sts.
Knit the same as the back to a height of 58.5 (61, 63.5) cm from the beginning. Finish by knitting a row on the WS.

Forming the neckline
Row 1 (RS): Work in patterns as set for 57 (64, 71) sts for left side, join second skein of yarn and bind off next 12 (14, 18) sts for neckline, work in patterns as set to end of row for right side– 57 (64, 71) stitches on each side.
Next, knit the two sides separately at the same time.
Row 2: on the right side, knit in patterns as set to the end of the side, on the left side, bind off 4 sts with yarn from another skein of yarn, knit in the pattern as set to the end of the side - 53 (60, 67) sts on the left side and 57 (64, 71 ) pet on the right side.
Row 3: On the left side, work in patterns as set to the end of the side; on the right side cast off 4 sts, knit in patterns as set to end of side - 53 (60, 67) sts on each side.
Row 4: On right side, work sts as set to end of side. On left side, cast off 3 sts, work sts as set to end of side - 50 (57, 64) sts on left side and 53 (60, 67) sts on right side .
Row 5: On the left side, work in patterns as set to end of side; on the right side cast off 3 sts, work in patterns as set to end of side - 50 (57, 64) sts on each side.
Row 6: On the right side, work in patterns as set to the end of the side; cast off 2 sts on left side, work in patterns as set to end of side - 48 (55, 62) sts on left side and 50 (57, 64) sts on right side.
Row 7: On left side, work in patterns as set to end of side; on the right side cast off 2 sts, knit in patterns as set to end of side - 48 (55, 62) sts on each side.
Row 8: On the right side, work in patterns as set to end of side; cast off 1 st on left side, work in patterns as set to end of side - 47 (54, 61) sts on left side and 48 (55, 62) sts on right side.
Row 9: On the left side, work in patterns as set to end of side; on the right side cast off 1 st, knit in patterns as set to the end of the side - 47 (54, 61) sts on each side.
Rows 10-17: Rep Rows 8 and 9 4 more times – 43 (50, 57) stitches remaining on each side at end of Row 17.
Knit straight two sides separately in patterns as set up to the height at which you began to form the shoulder line on the back. Work the last row on the WS.
Shaping the shoulder line
Row 1 (RS): On left side cast off 8 (9, 10) sts, work in patterns as set to end of side; on the right side, work in patterns as set to the end of the side - 35 (41, 47) sts on the left side and 43 (50, 57) sts on the right side.
Row 2: On right side cast off 8 (9, 10) sts, work in patterns as set to end of side; on left side, work in patterns as set to end of side - 35 (41, 47) sts on each side.
Rows 3-8: Repeat Rows 1 and 2 3 more times – 11 (14, 17) sts remain on each side.
Row 9: Cast off the remaining 11 (14, 17) left sides, on the right side work in pattern as set.
Close the remaining 11 (14, 17) right sides.
Sew shoulder seams, including sleeves.

Neckline
Using short circular needles, starting at the shoulder seam, pick up and knit 104 (106, 108) sts evenly along neckline. Place a marker for the beginning of the circular row, close the circular row and then knit an elastic band in circular rows:
Round 1: *k1, p1; repeat from * to the end of the row.
Round 2: Knit.
Rounds 3-15: Repeat Rounds 1 and 2 7 more times, then repeat Round 1 one more time.
Bind off all stitches as knit stitches. Sew side seams and sleeve seams. Fasten off the loose ends of the yarn.

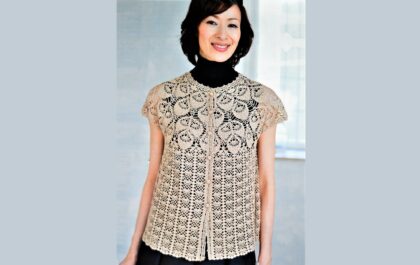
Patterns with round yoke crochet. Part 3
A collection of women's models for the summer season with a round yoke.
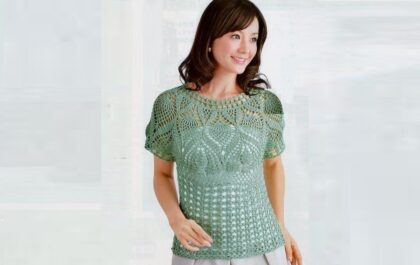
Patterns with round yoke crochet. Part 2
A collection of women's models for the summer season with a round yoke.