

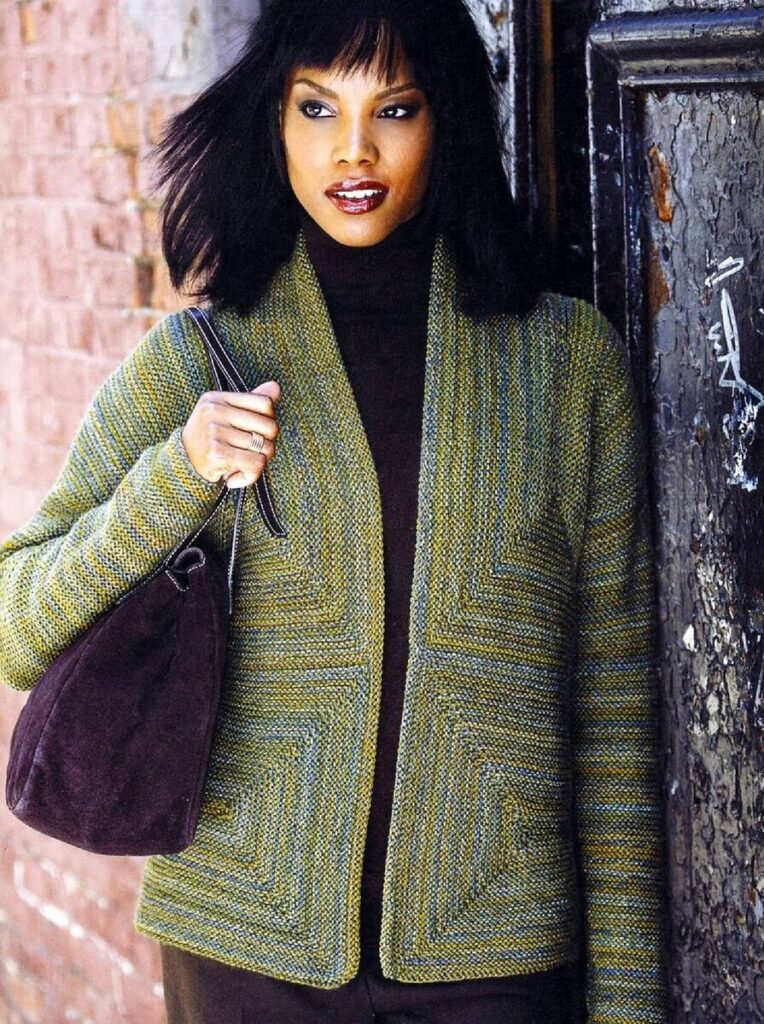
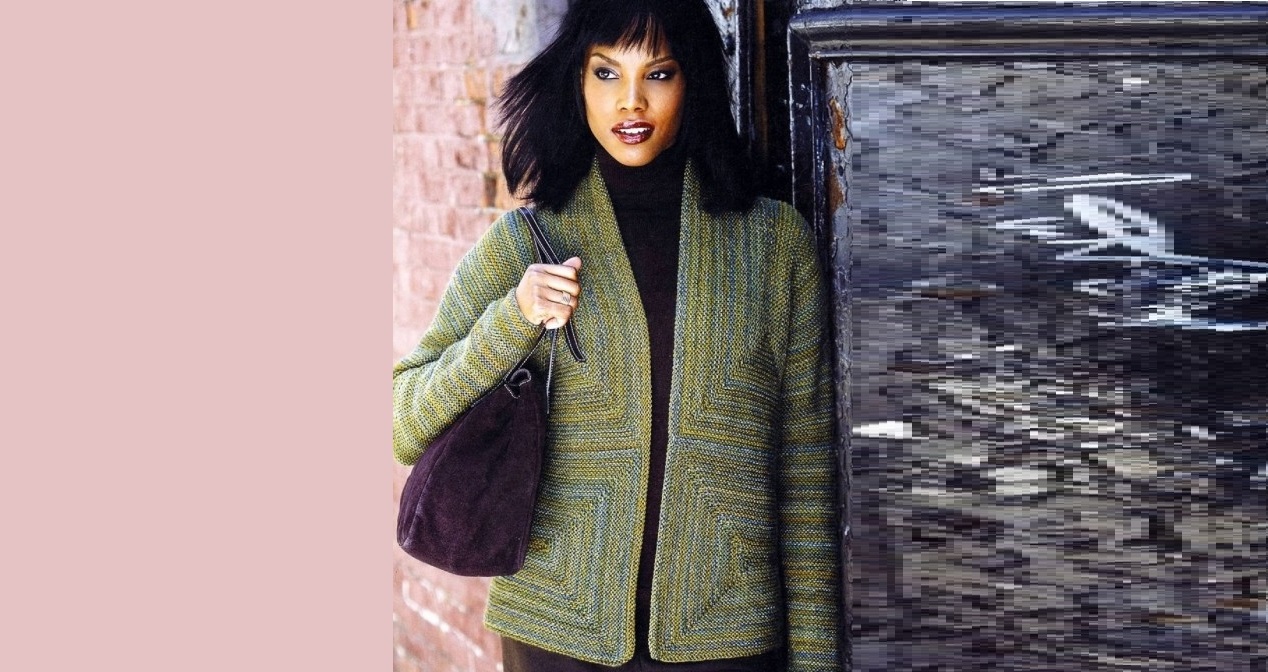
It's an established fact that garter stitch is mathematically perfect for knitting on the bias.
The structure of each bias-knit section is highlighted by the color transitions of the mélange yarn, while the geometric pattern is beautifully complemented by slip-on edges, crisp shapes and a neck-hugging collar.
DIMENSIONS XS (S, M, L, XL).
FINISHED PRODUCT DIMENSIONS
Chest (buttoned): 101.5 (111.5, 122, 132, 142) cm
Length: 58.5 (61, 65, 68.5, 70.5) cm
Shoulder: 43 (46, 48, 51, 53) cm

MATERIALS
• Original yarn
14 (16, 17, 19, 20) skeins of 50g/96m Reynolds/JCA Odyssey (wool) shade 502 DK Green (1) or any other with similar characteristics.
• Yarn option
7 (8, 9, 10, 10) skeins of 100g/192m
Malabrigo Hojas (merino wool)
"superwash") shade RI0880 Hojas or any other with similar characteristics
• removable stitch markers
• one pair of needles No. 7 (4.5 mm) or the size at which the desired density is obtained
• one pair of circular needles No. 7 (4.5 mm) 19P long and 36 rows equal to 10 cm in garter stitch with needles No. 7 (4.5 mm) 74 cm long
SPECIAL TECHNIQUES
Decrease row *K until there are 2 stitches left before the marker, 2KVmL, pass the marker, 2KVm, repeat from * to the end.
NOTES
1) Closing the loops on 3 knitting needles is marked in the diagrams with red lines.
2) Always cast on stitches with the work facing you.
3) Always cast off stitches on 3 needles with right sides facing each other.
BACK
Section 1
On circular needles using the short thread method, cast on 144 (156, 174, 186, 198) stitches. Do not join in a circle, knit in return rows.
* Row 1: K48 (52, 58, 62, 66) place marker, K48 (52, 58, 62, 66) K2, place marker, K48 (52, 58, 62, 66)
Row 2 (RS): Work a decrease row (see Special Techniques). Row 3: Knit.
Repeat the last 2 rows - 22 (24, 27, 29, 31) times, there will be 2 stitches between the markers.
Remove the markers.
Slip the first 26 (28, 31, 33, 35) sts onto a straight needle.
Holding the ends of two needles in the middle of the work, bind off the stitches on three needles.
Section 2
On circular needles, cast on 48 (52, 58, 62, 66) S (for bottom edge), cast on 48 (52, 58, 62, 66) K along the side edge of section 1 (middle back), cast on 48 (52, 58, 62, 66) P (for the top).
Start from *, end as section 1.
Section 3
On circular needles, cast on 62 (62, 65, 67, 66) sts, place marker, cast on 48 (52, 58, 62, 66) knits along top edge of section 2, place marker, cast on 62 (62, 65, 67, 66) ) P – 172 (176, 188, 196, 198) P.
**Row 1: Knit.
Row 2 (RS): Work a decreasing row.
Repeat last 2 rows 22 (24, 27, 29, 31) times.
There will be 2P between the markers. Slip the first 40 (38, 38, 38, 35) sts onto a straight needle.
Holding the ends of two needles in the middle of the work, bind off the stitches on three needles.
Section 4
On circular needles, cast on 62 (62, 65, 67, 66) K, place marker, cast on 48 (52, 58, 62, 66) K along top edge of section 1, place marker, cast on 62 (62, 65, 67, 66) ) Face along the side edge of section 3 – 172 (176, 188, 196, 198) P.
Starting from **, complete as section 3.
LEFT SHELF
Section 1
Knit as section 1 of the back.
Section 2
On circular needles, cast on 62 (62, 65, 67, 66) sts, place marker, cast on 48 (52, 58, 62, 66) sts along top edge of section 1, place marker, cast on 81 (81, 84, 86, 85 )tP (for the middle of the front and collar) – 191 (195, 207, 215, 217) P.
***Row 1: Knit.
Row 2 (RS): Work a decreasing row.
Knit, alternating the last 2 rows, another 10 cm.
Collar Formation
Starting at the long edge, cast off 19 sts (this will be half the back of the collar), then decrease as before until there are 2 sts left between the markers. Slip the first 40 (38, 38, 38, 35) sts onto a straight needle and bind off on three needles.
RIGHT SHELF
Section 1
Knit as section 1 of the back.
Section 2
On circular needles, cast on 81 (81, 84, 86, 85) K (for collar and center front), place marker, cast on 48 (52, 58, 62, 66) K along top edge of section 1, place marker, cast on 62 ( 62, 65, 67, 66)P – 191 (195, 207, 215, 217)P.
Starting from ***, complete as section 2 of the left shelf.
SLEEVES
On straight needles, cast on 43 (48, 53, 58, 63) sts.
Knit in garter stitch (K only) 5 cm.
Row with additions (RS): 2K, 1R from the broach, K, until there is nothing left
2P, 1P from broach, 2K.
Repeat the row with additions in each 14th row 8 more times 61 (66,71,76, 81)P. Knit evenly until the piece measures 40.5 cm from the beginning. Work the next right row as an inc row, repeat every 4 rows 9 more times - 81 (86, 91, 96, 101) Sts.
Close the loops.
ASSEMBLY
Connect the shoulder seams.
Place markers 21.5 (23, 25, 25.5, 26.5) cm below the shoulder line.
Sew the sleeves into the armholes between the markers.
Connect the side and shoulder seams.
Sew the collar to the bottom edge of the back neckline.
Sew a seam on the collar in the center of the back neckline.
Finishing the edge of the shelf
On circular needles, cast on 1 K from each stitch along the edge of the front and along the edge of the back neckline. Knit 2 rows.
Bind off the loops like knit stitches on the IP.

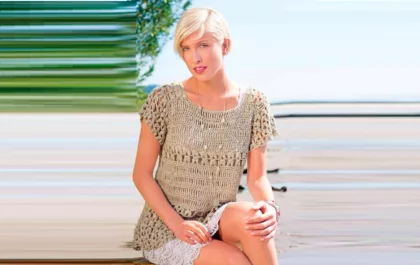
Ажурный пуловер с коротким рукавом
Изумительный джемпер с коротким рукавом из льняной пряжи лучший выбор для теплой погоды. Универсальный бежевый цвет отличный выбор.
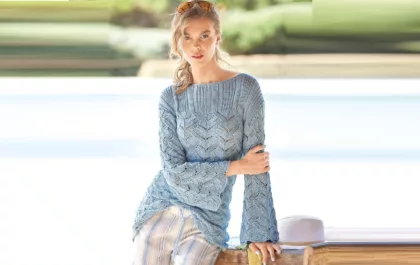
Голубой ажурный джемпер
Удобный прямой силуэт, красивый узор и приятная к телу пряжа из хлопка с небольшим содержанием кашемира делают этот джемпер желанным в любом гардеробе.