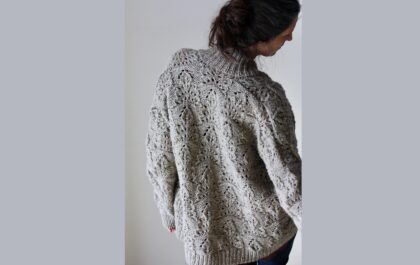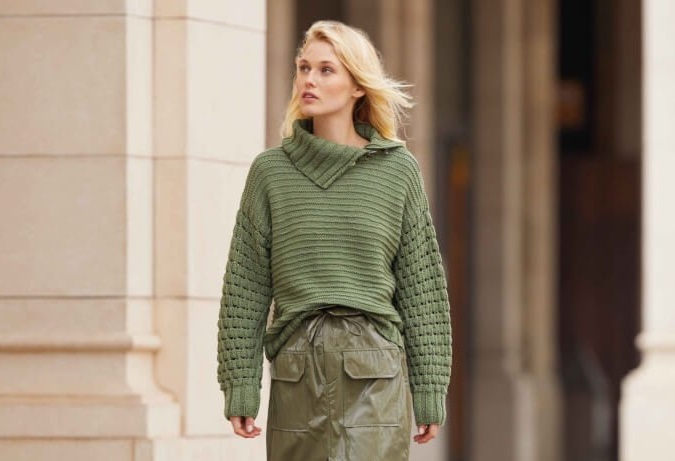

Чистошерстяной пуловер оверсайз, с высоким воротником, застегивающимся сбоку на пуговицы – универсальная модель, которая удачно пополнит ваш гардероб и останется в нем не на один сезон
Размеры: 36/38 (40/42) 44/46 (48/50)
Размеры российские: 42/44 (46/48) 50/52 (54/56)

Вам потребуется: 550 (600) 650 (750) г зеленой пряжи (100% шерсти; 120 м/50 г); спицы № 4,5; крючок № 3,5; 2 клинообразные пуговицы для застежки клевант.
Техника вязания.
Резинка: число петель кратно 6 + 3 петли + 2 кромочные.
1-й (= лицевой) ряд: кромочная, * 3 лицевые, 3 изнаночные, от * повторять, 3 лицевые, кромочная.
2-й (= изнаночный) ряд: петли провязать по рисунку.
В высоту повторять 1-й и 2-й ряды.
Лицевая гладь: лицевые ряды – лицевые петли, изнаночные ряды – изнаночные петли.
Платочная вязка: лицевые и изнаночные ряды – лицевые петли.
Поперечный ребристый узор: попеременно 2 ряда лицевой глади, 2 ряда платочной вязки.
Структурный узор: число петель кратно 6 + 2 кромочные. Вязать по схеме, на которой даны лицевые и изнаночные ряды. В ширину начинать с петель перед раппортом, повторять раппорт, заканчивать петлями после раппорта. В высоту повторять с 1-го по 12-й ряд.


Плотность вязания.
Поперечный ребристый узор: 20 петель и 29 рядов = 10 х 10 см.
Структурный узор: 26 петель и 25 рядов = 10 х 10 см.

ОПИСАНИЕ РАБОТЫ
Спинка: на спицы № 4,5 набрать 101 (113) 119 (131) п. и вязать для нижней планки 8 см резинкой. Продолжить работу поперечным ребристым узором, при этом в 1-м ряду равномерно прибавить 4 (2) 4 (1) п. = на спицах 105 (115) 123 (132) п.
Через 22 см от нижней планки закрыть с обеих сторон для формирования пройм сначала 1 раз по 4 (5) 5 (5) п., затем в каждом 2-м ряду еще 2 раза по 2 п. (1 раз по 3 п. и 1 раз по 1 п.) 1 раз по 3 п. и 2 раза по 1 п. (1 раз по 3 п., 1 раз по 2 п. и 1 раз по 1 п.) = на спицах 89 (97) 103 (110) п.
Через 46 (47) 48 (49) см от нижней планки закрыть с обеих сторон для плечевых скосов 1 раз по 8 (9) 9 (10) п. и в каждом 2-м ряду 2 раза по 8 (9) 10 (11) п.
Одновременно с началом плечевых скосов закрыть для формирования горловины средние 9 (11) 13 (14) п. и далее каждую сторону вязать отдельно. Для закругления горловины закрыть с внутреннего края в каждом 2-м ряду 2 раза по 8 п.
Вторую сторону закончить симметрично.
Перед: вязать, как спинку, но с более глубокой горловиной. Для этого через 43 (44) 45 (46) см от нижней планки закрыть средние 11 (13) 15 (16) п. и далее каждую сторону вязать отдельно. Для закругления горловины закрыть с внутреннего края в каждом 2-м ряду 3 раза по 3 п., 2 раза по 2 п. и 2 раза по 1 п.
Вторую сторону закончить симметрично.
Рукава: на спицы № 4,5 набрать 59 (59) 65 (71) п. и вязать для планки 8 см резинкой. Продолжить работу структурным узором, при этом в 1-м ряду равномерно прибавить 21 (27) 27 (27) п. = на спицах 80 (86) 92 (98) п.
В 7-м ряду от планки прибавить с обеих сторон для скосов 1 раз по 1 п. и в каждом 6-м ряду еще 14 раз по 1 п. = на спицах 110 (116) 122 (128) п. Прибавляемые петли включать в структурный узор.
Через 38 см от планки приступить к формированию оката: сначала закрыть с обеих сторон 1 раз по 2 п. и в каждом 2-м ряду еще 3 (4) 5 (7) раз по 2 п. = на спицах 94 (96) 98 (96) п. Через 3 (4) 5 (6) см от начала оката закрыть оставшиеся 94 (96) 98 (96) п.
Воротник: на спицы № 4,5 набрать 135 (141) 147 (153) п. и вязать 18 см резинкой, при этом начать с кромочной, 2 лицевых и 3 изнаночных и закончить, расположив петли симметрично. Закрыть петли по рисунку.
Сборка: выполнить плечевые швы.
Воротник вшить в горловину, начав и закончив на расстоянии 11 см от левого плечевого шва и наложив концы воротника друг на друга на глубину 3 см. На конце воротника, лежащем сверху, крючком № 3,5 выполнить 2 навесные петли (= прикрепить нить, 5 возд. п., 1 соед. ст. в место прикрепления): 1-ю п. расположить на расстоянии 3 см от края горловины, 2-ю п. на расстоянии 4 см от первой. На 2-м конце воротника в соответствующие места пришить пуговицы.
Вшить рукава. Выполнить боковые швы и швы рукавов.