
Вязаные снежинки крючком. Часть 2 находится здесь***

В холодное время года так хочется порадовать себя и своих близких красотой, которой вокруг бывает так мало! И вовсе не обязательно горевать по летним денькам, можно привнести в дом уют по мотивам зимней сказки, если знать, как своими руками создать праздничные символы зимы. Для этого можно воспользоваться пряжей, спицами или крючком. Нужно сказать, что зимняя тематика в вязании крючком или спицами, пожалуй, самая актуальная, а новогодняя тематика — одна из самых любимых всеми мастерицами — ведь она так поднимает настроение!
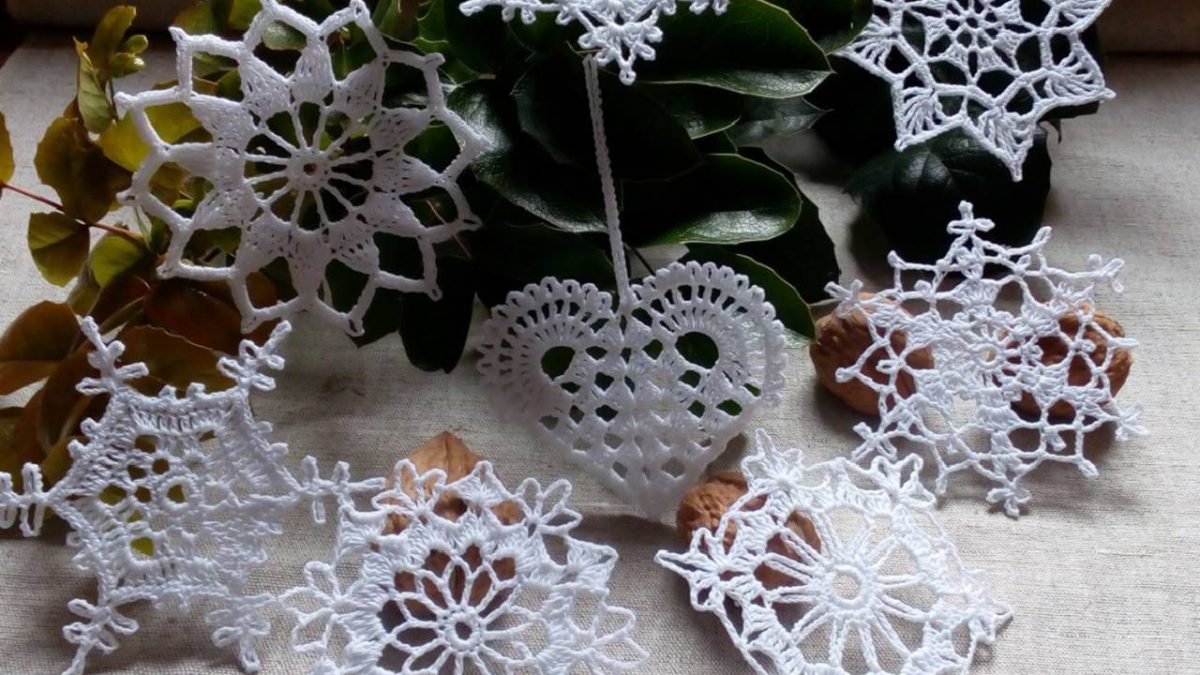
Одним из многих интересных зимних элементов, которыми можно украсить дом в период зимних праздников, да и будней тоже, являются связанные крючком снежинки.
Это очень милые и нежные ажурные изделия, которые можно «применять» в хозяйстве в самом разном качестве:
- елочные игрушки;
- праздничные подставки под чашки и бокалы;
- новогодние брелки;
- украшения-наклейки для простеньких баночек-скляночек;
- элементы декора новогодних подарков и открыток;
- нашивка на свитера, шапочки, шарфы.
В общем, снежинки связанные крючком пригодятся во всем, на что хватит фантазии.
Вязание крючком снежинок подойдет и новичкам в этом деле, если выбирать среди легких вариантов схем.
Подробное описание снежинки крючком

Вяжется эта снежинка согласно следующей схеме и подробному описанию с фото:

Делаем кольцо из нити и вяжем 1 воздушную петлю подъема.
1 ряд: вяжем 8 столбиков без накида в кольцо, затягиваем кольцо из нити и вяжем соединительный столбик, вводя крючок в 1-ый столбик без накида этого ряда.
2 ряд: вяжем 3 воздушные петли подъема + 2 воздушные петли по схеме узора (т.е. вяжем 5 воздушных петель), в следующую петлю вяжем столбик с накидом, далее вяжем 2 воздушные петли, *в следующую петлю 1 столбик с накидом, снова 2 воздушные петли* от * продолжаем вязать до конца ряда.

Замыкаем ряд соединительным столбиком, крючок вводим в 3 воздушную петлю подъема.
3 ряд: для того чтобы перейти к вязанию из арки, свяжем 1 соединительный столбик, затем 2 воздушные петли подъема, вяжем 3 столбика с накидом с общей вершиной, далее вяжем 5 воздушных петель, *в следующую арку вяжем 4 столбика с накидом с общей вершиной, снова 5 воздушных петель*, продолжаем вязать от * до конца ряда. Замыкаем ряд соединительным столбиком, вводя крючок в общую вершину столбиков.

4 ряд:вяжем 1 воздушную петлю подъема и 1 столбик без накида в ту же петлю основания, вяжем пико из 3-х воздушных петель, и столбик без накида в ту же петлю основания, далее вяжем пико из 5 воздушных петель, и столбик без накида в ту же петлю основания, вяжем пико из 3-х воздушных петель и столбик без накида, вводя крючок в ту же петлю, далее мы вяжем 3 воздушные петли *в общую вершину следующей группы столбиков мы вяжем аналогично 1 столбик без накида, пико из 3 воздушных петель, 1 столбик без накида, пико из 5 воздушных петель, 1 столбик без накида, пико из 3-х воздушных петель, 1 столбик без накида.

Далее 3 воздушные петли*. От * мы продолжаем вязать до конца ряда. Замыкаем ряд соединительным столбиком в первый столбик без накида этого ряда. Осталось лишь спрятать кончики нитей и снежинка готова!

Когда изделия готовы, их придётся накрахмалить, заблокировать на поверхности, высушить и прогладить.
Как накрахмалить
Существует несколько способов:
- С помощью сахара. В одном стакане горячей воды растворите 12-13 ст. ложек сахара. Намочите снежинку в растворе и сделайте блокировку, либо высушите на плоской поверхности.
- С помощью картофельного крахмала. В одном стакане горячей воды растворите 2-3 ст. ложки крахмала. Пропитайте снежинку раствором и заблокируйте с помощью иголок, высушите.
- Клеем ПВА, разбавленным водой 1:2. Заблокируйте снежинку, возьмите кисть и пропитайте изделие клеем ПВА, затем высушите.
- Из аэрозольного баллончика с крахмалом. Продаются такие специальные баллончики в рукодельных магазинах. Следуйте инструкции для накрахмаливания.
Схемы снежинок
Схема 1

Схема 2

Схема 3

Схема 4

Схема 5

Схема 6

Схема 7

Схема 8

Схема 9

Схема 10

Схема 11

Схема 12

Схема 13

Схема 14

Схема 15

Схема 16

Схема 17

Схема 18

Схема 19

Схема 20

Схема 21

Схема 22

Схема 23

Схема 24

Схема 25

Схема 26

Схема 27

Схема 28

Схема 29

Схема 30

Условные обозначения

1 Comment
Leave a Reply

Wow. So inspired designs. I so glad. Exelent knitting work idea. You are great designer. I appreciate.