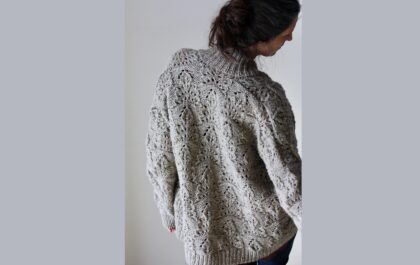

Если вы ищите вариант необычного елочного украшение, то непременно воспользуйтесь советами из нашего мастер-класс, как связать новогодний шар крючком.
Готовое изделие будет ажурным и невесомым, добавит в ваш праздничный декор уюта.
Обращаться с такими елочными украшениями надо бережно, они хрупкие словно стеклянные игрушки.
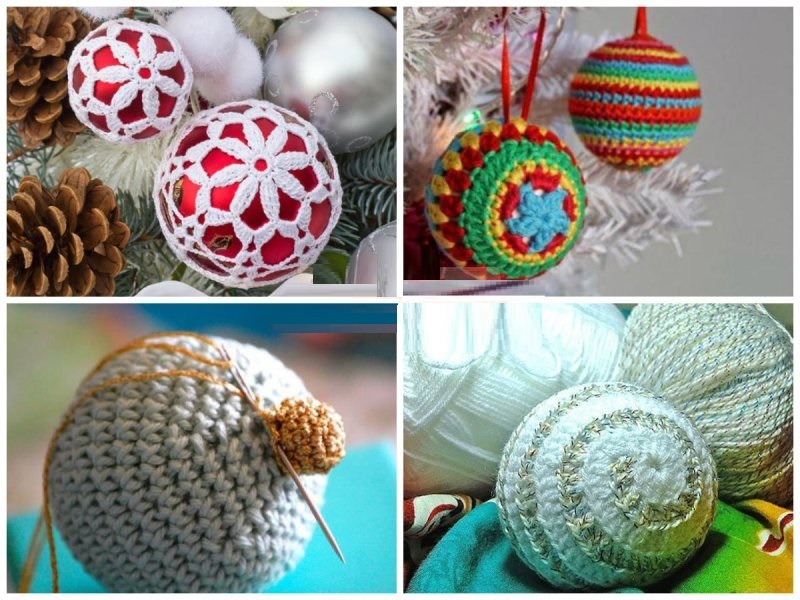
Кроме ажурных вариантов есть и другие идеи, например, шарик можно связать в технике амигуруми, тогда получится яркий шар, однотонный или с рисунком.

Новогодний шар крючком
Для нашего первого мастер-класса вам обязательно пригодятся схемы салфеток крючком или других круглых ажурных мотивов. Если вы решили связать маленький ажурный шарик, то состоять он будет с двух круговых мотивов, соединенных между собой.
Набор материалов, чтобы сделать вязаные новогодние шары крючком, нам понадобится самый простой, такое новогоднее творчество не станет ударом по семейному бюджету, а некоторые материалы наверняка найдутся в вашем доме.
- Белые ниточки «Ирис», российского производства
- Клей ПВА
- Воздушный шарик не надутый (желательно круглой формы)
- Инструмент для вязания соответствующего размера

Теперь нам надо связать два одинаковых круглых мотива, следуя за представленной схеме. Вы можете использовать наш вариант или найти свою схемку, которая понравится вам больше.
Схемы мотивов для обвязки новогодних шаров можно посмотреть здесь***
В основании нашего мотива будут лежать 12 воздушных петелек, таким образом, центральное отверстие будет достаточно большим, чтобы затем просунуть в него сдутый шарик.
Начнем с вязания первого мотива: набираем 12 воздушных петелек и закрываем их в замкнутый круг с помощью соединительного столбика. Теперь поднимаемся на второй ряд благодаря трем петлям подъема. В следующем ряду у нас будет 24 столбиков с одним накидом (23 столбика и 3 петли подъема в самом начале). Провязывать столбики необходимо в кольцо, стараясь, чтобы они были максимально одинаковыми, чтобы петельки не были слишком растянутыми или чересчур перетянутыми.
В следующем ряду у нас будут арки, они вяжутся через каждые два столбика предыдущего рядка. Сама арка состоит у нас из семи петелек воздушных. Мы провязываем семь петелек, затем пропускаем от основания цепочки еще два столбика и провязываем столбик без накида в следующий столбик основы. Далее опять набираем цепочку из семи петелек, и опять замыкаем арку столбиком без накида. По такому принципу надо провязать в третьем рядочке восемь арок. Столько же арок будет и в следующем ряду, но на этот раз они будут состоять из девяти воздушных петель. Основание арки должно выходить из середины арки предыдущего ряда, можно провязывать не конкретно в центральную петлю, а в саму арку.

В следующем ряду каждую арку надо обвязать столбиками с накидом: по 11 столбиков в каждую арку без соединительных воздушных петелек между каждой группой по 11 столбиков. Основная часть мотива связана и осталось только на середине каждой арки сделать по три шишечки, а затем между ними провязать цепочки воздушных петель, чтобы закрыть последний ряд. Вязать мотив совсем не сложно, здесь используется только три вида петелек, поэтому даже если вы держите инструмент в руках впервые, с этим заданием вы справитесь без проблем. Главное, пошагово следовать за предложенной схемой, а еще вы сможете освоить вязание снежинок.
Теперь надо сделать и второй мотив, чтобы получился новогодний шар крючком, схема для мотива используется та же самая, ведь нам необходимо, чтобы готовое украшение получилось симметричной круглой формы. У второго мотива следует не довязывать последний ряд, он будет использоваться, чтобы соединить оба полученных круглых мотива.

Вязаные новогодние шары крючком
У нас получатся самые простые вязаные новогодние шары крючком, схемы лучше брать элементарные, для начинающих, чтобы не возникло сложностей в процессе работы. Это отличная возможность потренироваться перед выполнением более сложной работы, шаров более крупного размера.
Обе круглые половинки следует сложить изнаночной стороной друг к другу, а затем соединить их по кругу. Здесь мы будем провязывать так – три столбика с двумя накидами, затем две воздушные петельки, здесь надо следовать за схемой и за пошаговыми картинками в нашем мастер-классе. Таким образом, закончив провязывать эти элементы по кругу, мы соединим в одну деталь обе половинки. После этого нам необходимо придать полученной заготовке шарообразную форму и зафиксировать результат.
В тарелочку необходимо налить ПВА, при необходимость чуть разбавить его водой, если клей кажется вам слишком густым – всего пару столовых ложек на 100 мл клея. Получившуюся вязаную заготовку надо опустить в клей и оставить на несколько минут, чтобы клей как следует пропитал ниточки. Затем заготовку надо достать и немного отжать, чтобы убрать излишки клея, вы можете выложить изделие на ткань сухую и чуть промокнуть. В случае, если у вас будут чересчур много клея в нитках, то и готовое украшение будут слишком долго сохнуть и может получиться тяжелым.

Теперь нам надо свернуть резиновый шарик в трубочку, чтобы его удобнее было просовывать в центральное отверстие нашей заготовки. Резиновую трубочку надо просунуть в отверстие и вытянуть с другой стороны. Теперь надо растянуть вязание, но при этом хвостик надо оставить подлине, чтобы внутри он надулся ровнее.
Осталось только сформировать новогодние шары крючком со схемами, для этого надо надуть шарик. Он должен быть чуть больше, чем вязаная заготовка, поскольку во время сушки он может чуть сдуться. Нить, которой вы завязали резиновый кончик, надо периодически смачивать, поскольку она после высыхания слишком стянет узелок. Когда полностью высохнет вязаная заготовка, надо отрезать узелок так, чтобы шарик начал сдуваться потихоньку, а когда он уменьшиться до минимума, его можно извлечь из шарообразного вязаного украшения.

Теперь у вас получилось ажурное елочное украшение, осталось только привязать сверху петельку и можно подвесить его на елку. Готовое украшение можно покрыть лаком с блестками, а еще блестки можно замешать в клей, тогда елочная игрушка получится еще более яркой, оригинальной.
Как видите, совсем не сложно связать новогодние шары крючком, и с такой работой сможет справиться начинающая мастерица. Также просто придать вязаному изделию шарообразную форму, но надо заручиться терпением, чтобы оно полностью высохло и не деформировалось, когда вы будете вынимать шарик.

Новогодний шар крючком: схема и описание
С помощью вязания можно создавать оригинальные елочные игрушки, будь это вязаная миниатюрная елочка или ажурный шарик. В технике амигуруми можно связать разноцветные, яркие, полосатые изделия, которые станут украшением любого интерьера. Их можно использовать для оформления детской комнаты, ведь такие мягкие игрушки совершенно безопасны для ребенка, с ними они могут играть. Выполнить их можно и спицами, но расширение и сужение полотна легче дается, если использовать крючок.
Чтобы по принципу амигуруми получить новогодний шар крючком, схема и описание вам понадобится для самого простого ровного шарика. По такой схеме его можно получить любого размера: от самых маленьких, чтобы обвязать деревянную бусину, до крупных, которые мы и будем использовать для украшения елки.
В отличие от предыдущего варианта, для игрушки-амигуруми нам понадобится шарообразная основа, чтобы готовое украшение держало нужную нам форму. Конечно, купить можно деревянную или пенопластовую заготовку, которые мы обычно используем, чтобы сделать новогодние елочные шары своими руками. Но мы предлагаем вам бюджетное решение – использовать старую пластиковую елочную игрушку.

Новогодние шары, связанные крючком
Когда мы определились с основой, можно начинать выполнять новогодние шары, связанные крючком. Здесь нам понадобятся только нитки и инструмент, а еще можете подготовить булавку-маркер, чтобы не запутаться в рядах. Если это ваша первая попытка, то лучше остановите выбор на однотонном изделии, а в дальнейшем вы можете навязать разнообразных полосатых игрушек и даже с геометрическим рисунком.
Сначала нам надо сделать кольцо амигуруми и провязать в него шесть столбиков, затем изделие пойдет на расширение в каждом ряду по схеме обычного круга. К восьмому ряду у нас должно получится 48 петель – в каждом ряду их количество должно увеличиваться на шесть штук. Затем надо вязать без изменений, не выполняя прибавки. С 9 по 15 рядок мы будем провязывать по 48 столбиков, а с 16 будут начинаться убавки.

Убавки в шарике амигуруми делаются по такому же принципу, как и прибавки – в каждом рядке надо убавлять по шесть столбиков. Таким образом, к 21 ряду у вас останется всего 12 столбиков, а в следующем – останется 6 столбиков, после чего надо лишь стянуть отверстие и в вас готов шарик.
Обязательно надо посчитать, сколько рядков с прибавками вы провязали, ведь в своем вязании вы будете ориентироваться на размер вашей пластиковой заготовки. Соответственно, столько же рядочков у нас будет и убавок, и, скорее всего, такое же количество рядочков без изменения мы будем провязывать. В представленном варианте у нас схема – 7-7-7.
Это самое простое вязание новогодних шаров крючком, схемы вам вовсе не пригодятся, но в процессе создания вязаного полотна важно «примерять» его на пластиковую заготовку, чтобы полотно плотно облегало стенки. Можно для каждого рядочка выбирать новый цвет пряжи, чтобы готовое украшение было ярким и неповторимым.